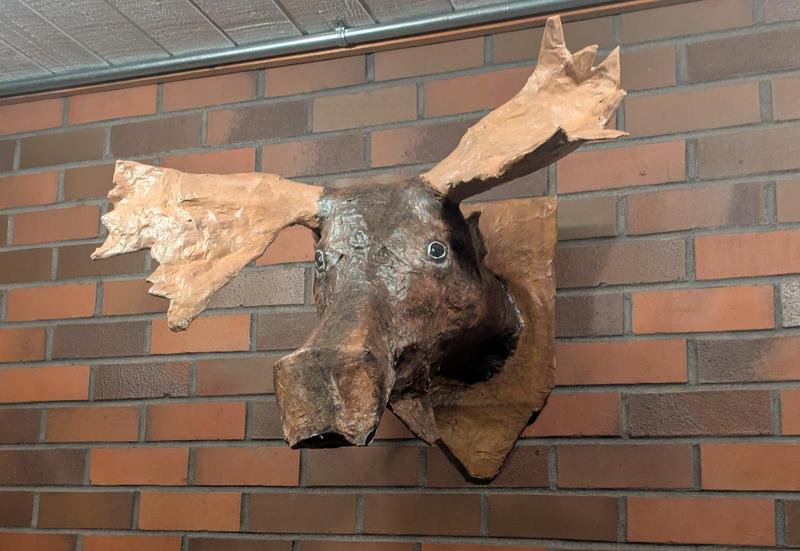
Project: How To Make a Paper Mache Taxidermy Moose Head
Sometimes, a wall calls out for a taxidermy moose head. My mom's house has such a wall: a tall, wide, brick chimney stretching two stories. The moose hanging there would gaze pensively, wondering at the strange lives of humans as he observed all the goings-on in the living room below.
I guess she never thought I'd take our joking about the wall's needs seriously.
This year for Christmas, I gave her a paper mache moose head in the style of a taxidermy moose for her wall.

Step one: Making the moose base
The first step was the base sculpture. I used cardboard from cut up boxes, a couple toilet paper rolls, scrap paper, newspaper, and masking tape to make a moose-ish shape.
The antlers were tricky and needed the first layer of paper mache to really start coming together.
Step two: Paper mache layers
I made a traditional flour and water paste. We actually subscribe to the local paper, so I had plenty of newspaper to tear into strips. Dip each strip, slide the extra paste off with your fingers, apply to moose.
I applied several layers over the entire moose to build up the structure. The moose balanced on extra cardboard boxes for support as each layer dried. When the antlers and face had enough structure, I added a flat piece of cardboard as the back mount. I embedded a piece of wire around the back mount for hanging.


Step three: Painting the moose
When the paper mache was dry and felt sufficiently sturdy, I painted the moose. I used some of my kids' tempera craft paint. I painted a base layer of brown for the fur, lighter brown for the antlers, and darker brown for the mounting board. The paint was on the thin side, so everything needed at least two layers to cover up the newsprint.


Step four: Modpodge to seal the moose
When the paint was dry, I painted a protective layer of matte Modpodge over the entire moose.


Step five: Profit
When the moose was unwrapped on Christmas, much anticipated laughter ensued. And now the moose proudly hangs on its own brick wall!


Honk! Learning from a Dynamic Public Music Festival
