Tutorial: How to Make a Camp Sink/Dishwashing Station with PVC (In Three Easy Steps!)
For a recent camping trip, we put together this easy yet awesome camp sink/dishwashing station! It only took an hour or two to cut the pieces and assemble, and saved us time and hassle at the campground.
When we decided that this would be the year we started tent camping as a family (with four young kids!), I knew I wanted to build this sink. Washing up after meals with only a spigot isn't my idea of fun.
I went on many weekend camping trips with girl scouts as a kid. One mom always brought along her PVC dishwashing station. It made cleaning up after group dinners a breeze. (Well, as much of a breeze as hand washing dishes by lantern-light can be, I suppose.) With girl scouts, everyone had their own sets of reusable camp dishes, so there was a lot to wash. Even if, now, we decide to bring disposable dishes or plasticware to make cleanup faster, there are always pots, serving spoons, and miscellaneous other dishes that will need to be cleaned.
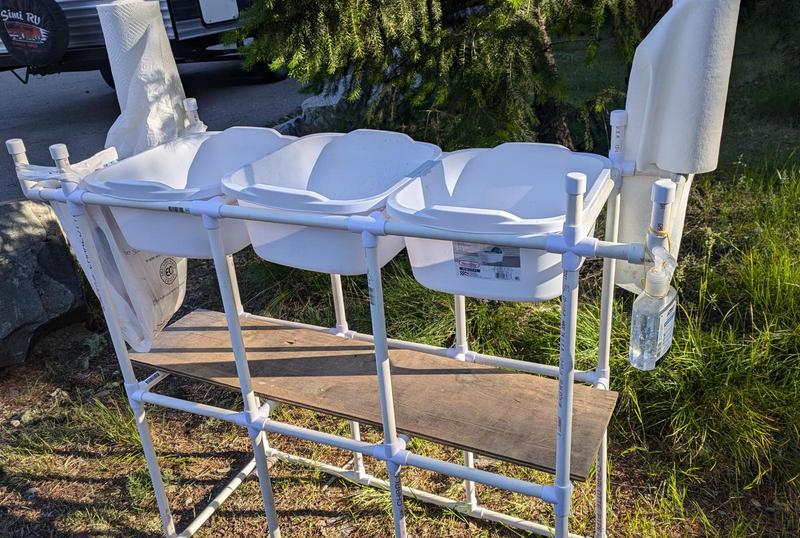
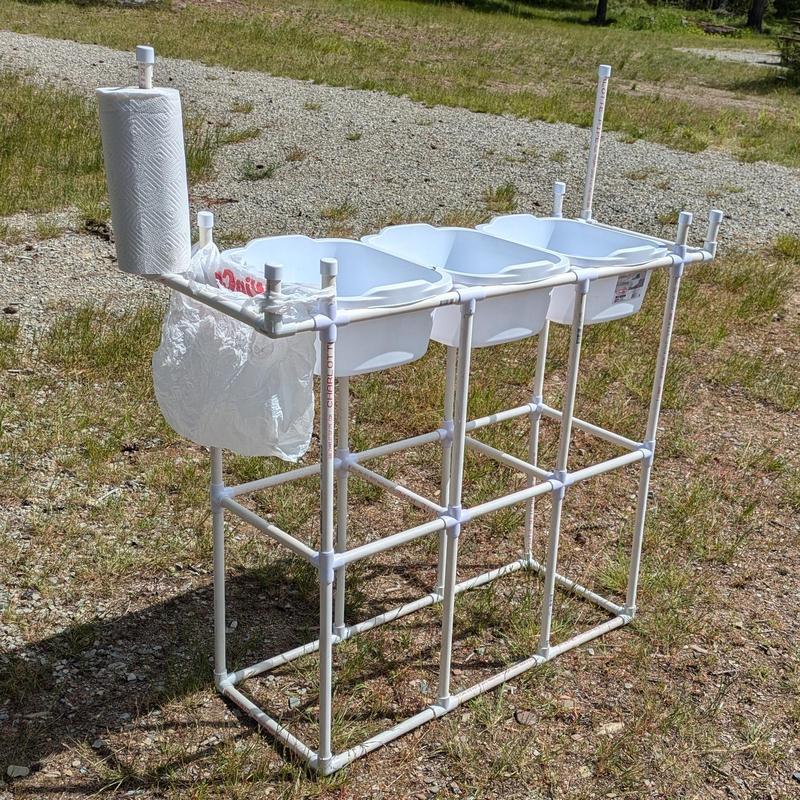
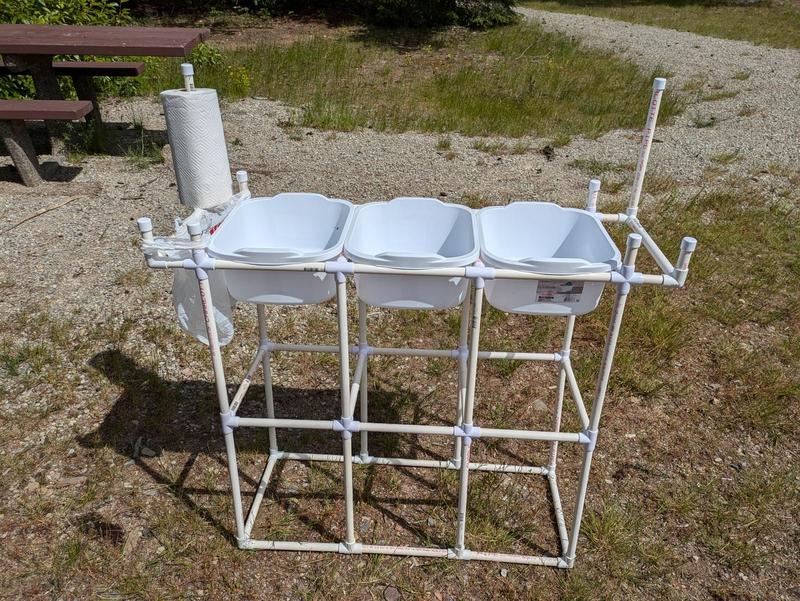
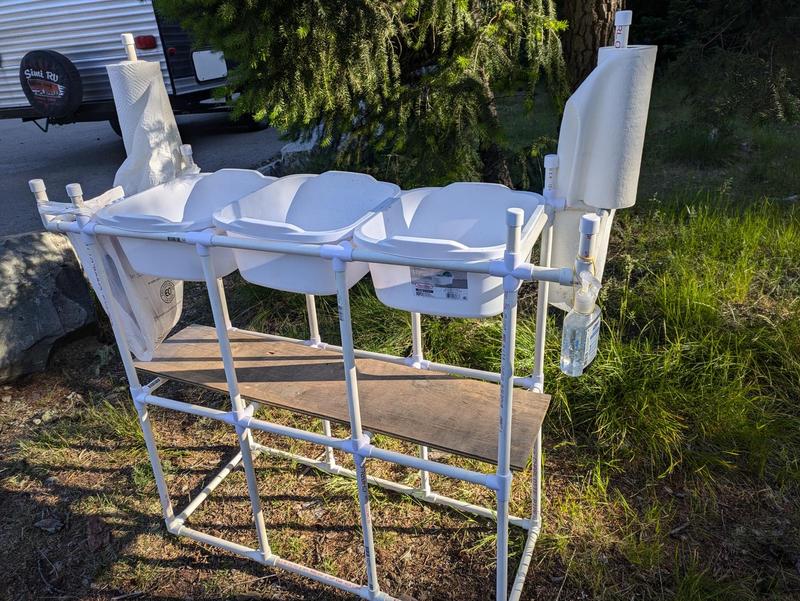
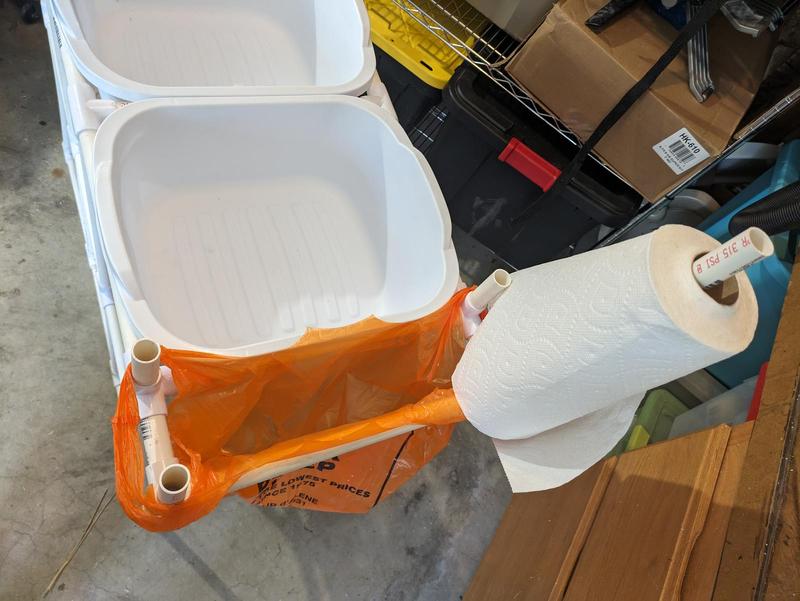
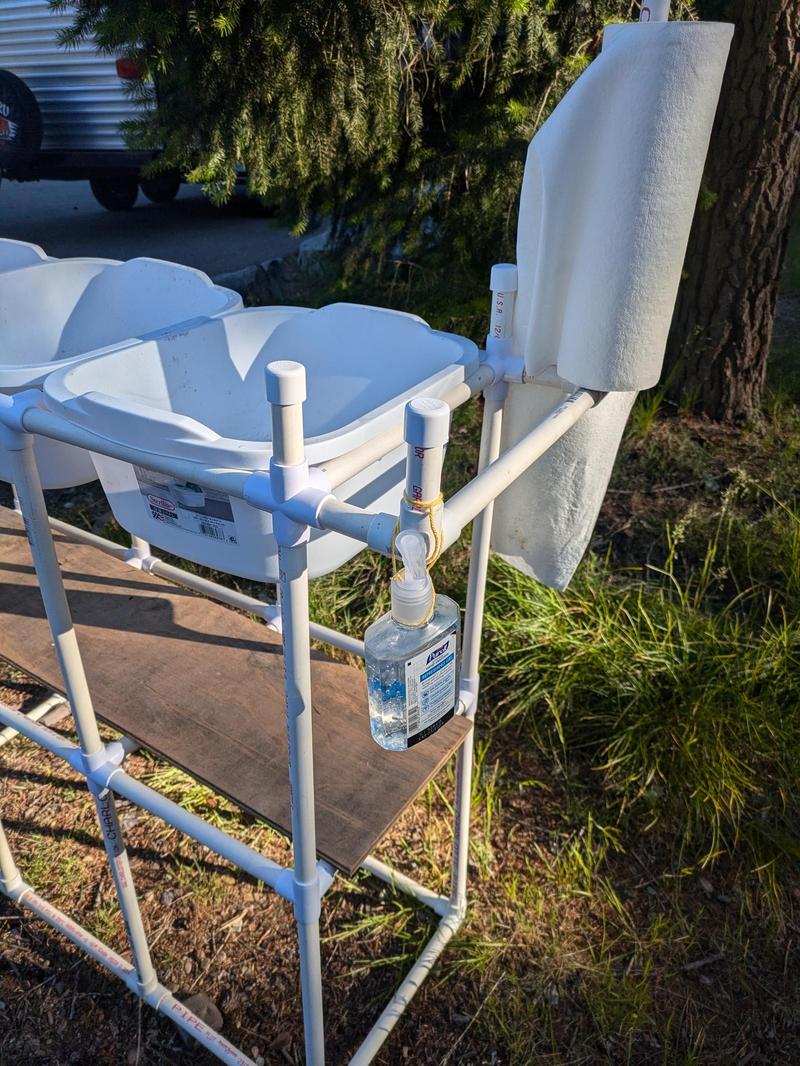
The camp sink I remember was a basic three-bin station. For ours, we elaborated on that basic design, landing on this functional and easy to assemble dishwashing station, complete with paper towel holder, towel bars, and lower shelf for storage. I also hung a hand sanitizer bottle from one of the towel bars.
Step One: Collect Sink Materials
Supplies needed:
- 6 10" lengths of 1/2" PVC (666" needed total, plus some extra for inefficient cutting)
- 8 caps
- 8 3-way corner connectors
- 4 3-way T connectors
- 8 4-way corner connectors
- 8 5-way connectors
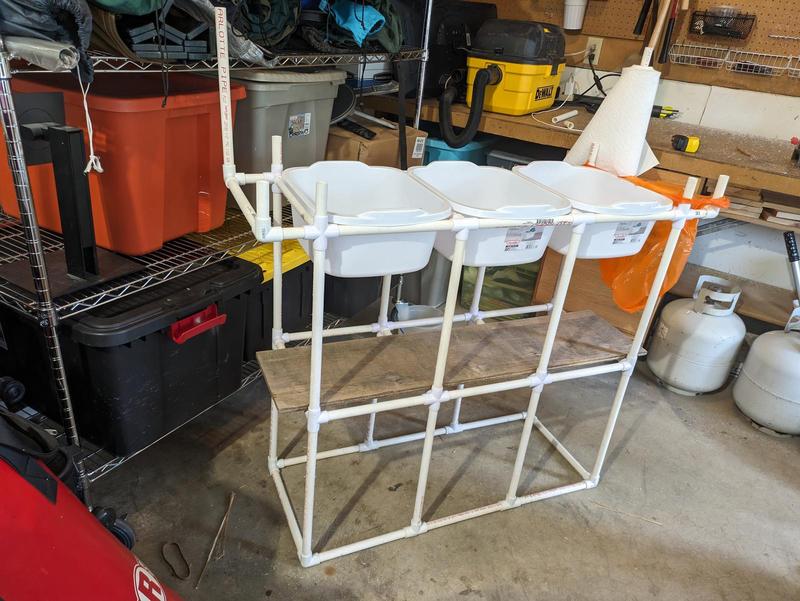
- 3 plastic washbins (we used 12qt Sterilite bins from Walmart, dimensions 15" L x 12 ¾" W x 8 1/2" H)
- 1 wood board (we used a scrap piece approximately 9"x36")
Most of these supplies are readily available at your neighborhood hardware store.
However, we had to order the 4- and 5-way connectors online. The hardware stores by us didn't carry them because they aren't a standard plumbing fitting. They are readily available via numerous online vendors for the hobbyists who want to build stuff with PVC.
Tools needed:
- Measuring tape
- Pen or pencil for marking lengths
- Chop saw or hacksaw.
- (Optional) PVC glue
Step Two: Cut PVC into sink-sized pieces
We used the chop saw, but you could use a hacksaw. The PVC lengths needed are:
- 10 3in
- 18 11in
- 14 13in
- 16 16in
If you're using the same size bins we used, then the dimensions listed here will be fine. If you are using different-sized bins, I recommend cutting and building the top layer first to ensure your bins fit. Below, you'll find lists of which pipe lengths are needed for each layer of the sink. Adjust as necessary for your bins.
The 16-inch pipes are all for the vertical uprights. If you want a taller sink, make these pipes longer.
Step Three: Assemble Sink
We started with the top layer to make sure the bins fit. If you're using the same size bins we used, then you can assemble from the bottom up with the following assembly instructions. If you are using different-sized bins, I recommend cutting and building the top layer first to ensure your bins fit.
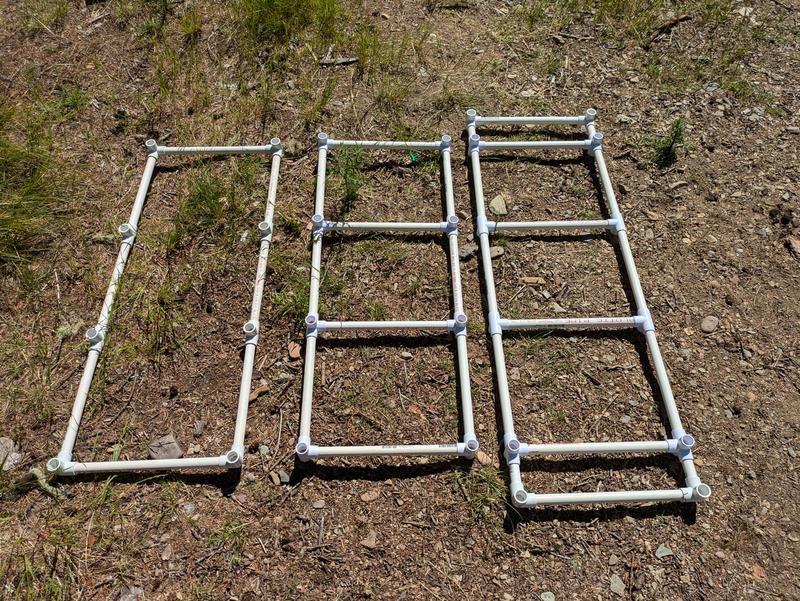
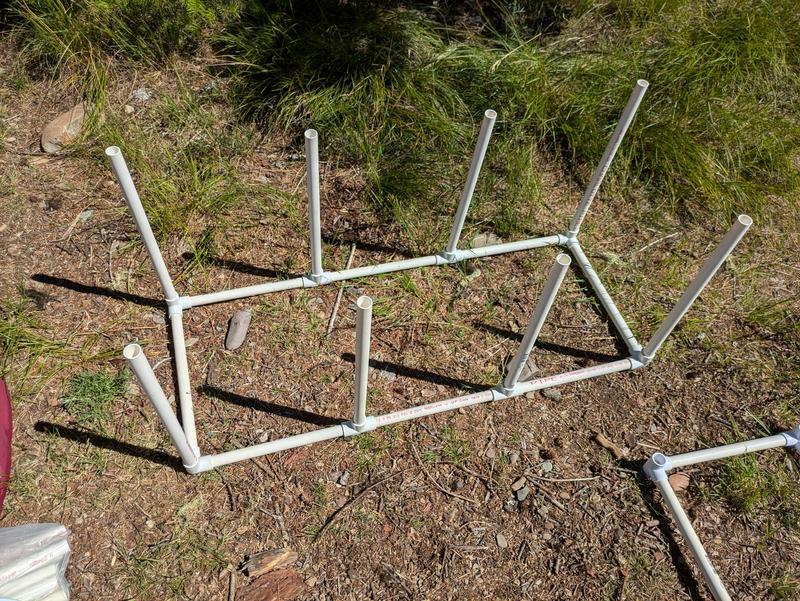
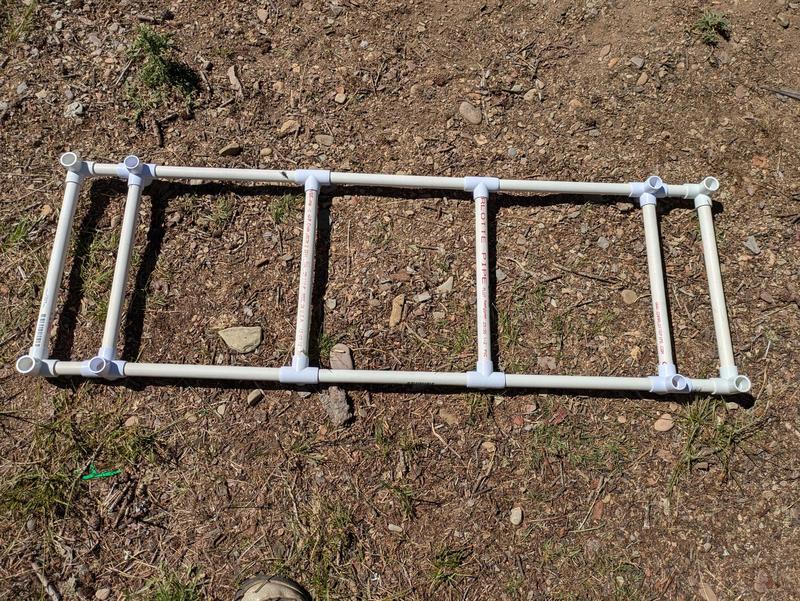
Bottom layer: Use 3-way corners for the corners of the rectangle. Along each of the rectangle's short sides, use a 13in pipe (2 13in). On each long side, connect a 11in pipe, a 3-way T, an 11in pipe, another 3-way T, and another 11in pipe to the other corner. (In total: 4 3-way corners, 4 3-way Ts, 2 13in pipes, 6 11in pipes.) See the pictures.

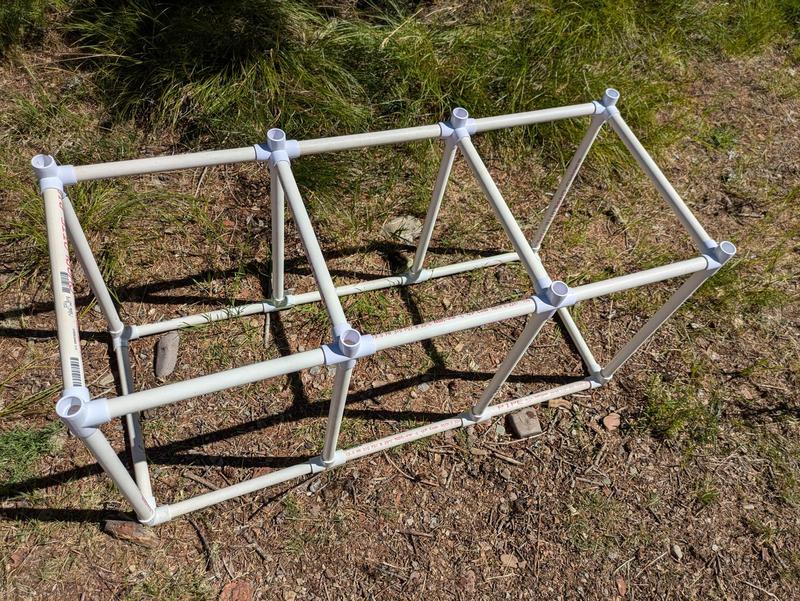
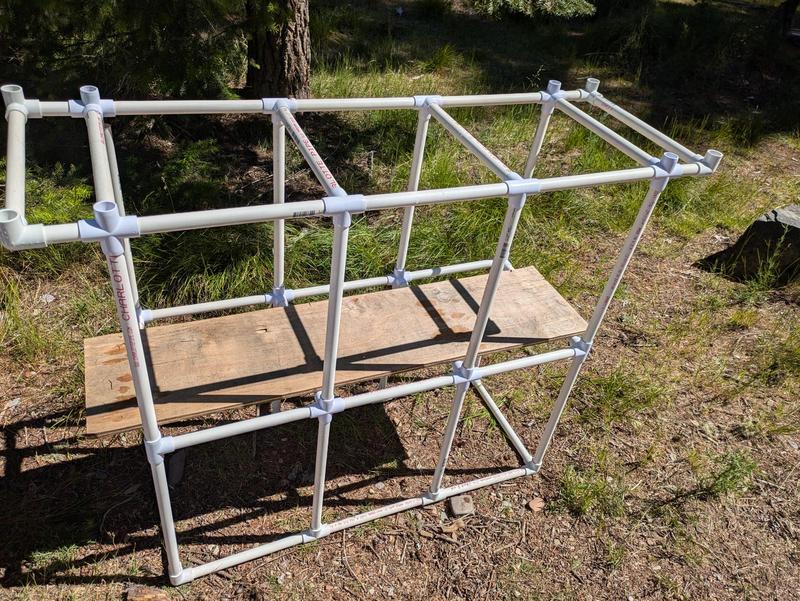
Middle layer: Connect 8 16-in pipes as vertical uprights. Then add the middle layer of connectors. Here, you need 4 4-ways for the corners and 4 5-ways for the central connections, like in the photo below. 4 13in pipes go across on the short side (the shelf will rest on these), and 6 11in pipes are used between connectors on the long side. Then add 8 16-in pipes as uprights again.

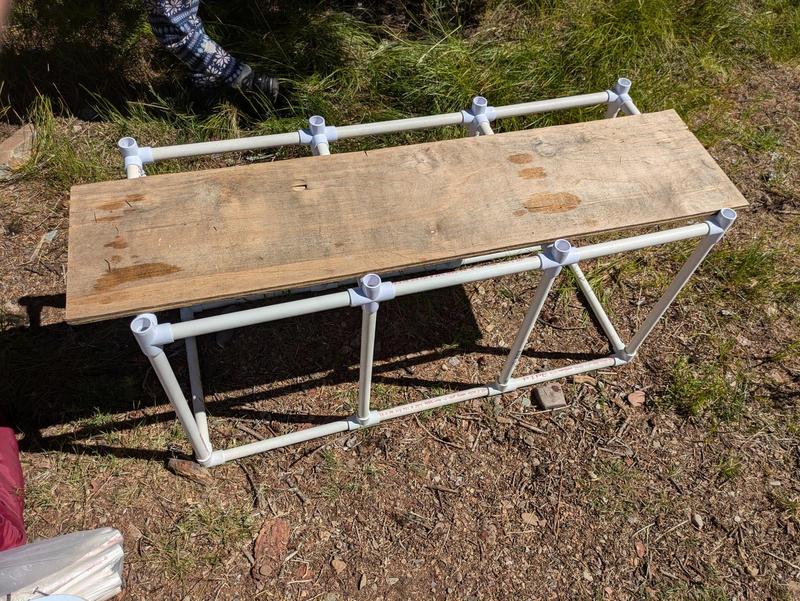
Top layer: For the top layer of connectors, you will need 4 4-ways for the central connections, and 5-ways on the corners so you can add the towel bars and paper towel holders. 4 13in pipes go across the short sides, and 6 11in pipes are used between connectors on the long edge, just like in the middle layer.
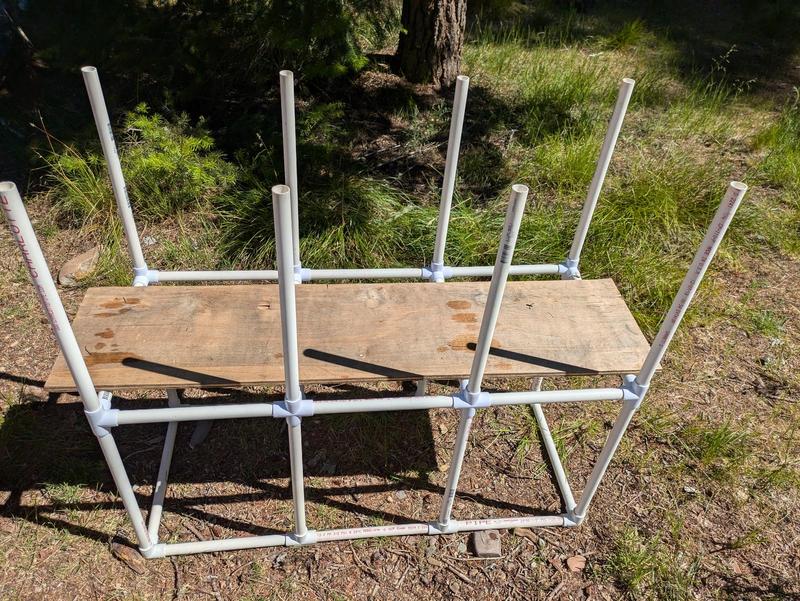
On each short end of the rectangle, at the 5-way corners, attach 3in pipes horizontally. Add a 3-way corner to add each and put a 13in pipe across as the towel rod. Attach one paper towel holder 13in pipe vertically at one corner, with 3in pipes vertically at the other uprights. Cap all the uprights. (In total: 10 3in pipes, 4 3-way corners, 4 13in pipes, 8 caps.)
Ta-da!
How Do We Fix Sprawl? Book Review: Sprawl Repair Manual by Gail Tachieva