Bees: Splitting a Hive That Survived the Winter
Our bees woke up and ventured out in early March. Our winter felt fairly warm overall, with far more rain than snow, and snow that melted within days instead of piling up. But we did have a couple freezing weeks early on with sub-zero temperatures. We also had a warm week in March that may have tempted plants out of dormancy, only to slam them with more snow and cold at the end of the month. So, all in all, it counted as a harsh winter for living things.
By mid-Marsh, our bees were venturing out to find pollen in the early crocuses and buttercups.
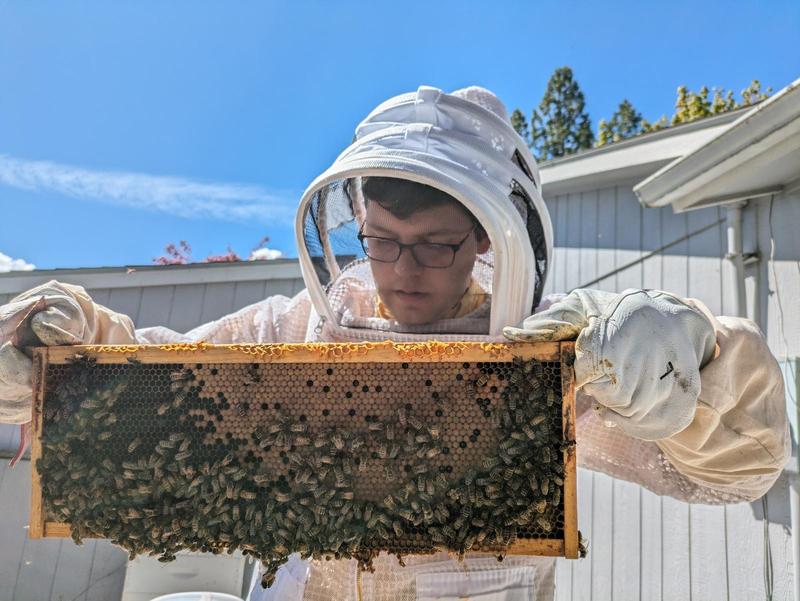
We performed our first end-of-winter hive inspection in late March. Our primary questions: Had all the hives survived? What was the status of their honey stores? Had the queens started laying again?
(Curious about our bees? Read about our hive setup, our first honey harvest, and how we prepared the bees for winter.)
Not all the hives survived winter
Three of our four hives survived.
Hive #1 and Hive #2: Queens, bees, no brood or larvae. Were they just behind, or were they dying?
Hive #3: Dead. We suspect a combo of disease from varroa mites and the sub-zero cold snap. We were slow to treat for mites last year (oops); it's a marvel only one hive died as a result. In this hive, we had noticed a few bees with deformed wings during our late fall inspections—which is a sure sign of disease.
Hive #4: Amazing! Going strong. The queen had already ramped up laying; there were brood cells and larvae galore. Relevantly, this hive gets the most winter sun; the slow two get more shade. Perhaps the extra dose of sunshine had helped them out.
We decided to wait another month or so, then attempt a hive split from strong Hive #4 into the now-defunct Hive #3. We gave each surviving hive a pollen patty to help them out. We also decided to be proactive about mite treatment this year, and to stay on schedule with hive inspections. (We had faltered last year for numerous reasons. Turns out, you can be juggling too many projects at once!)
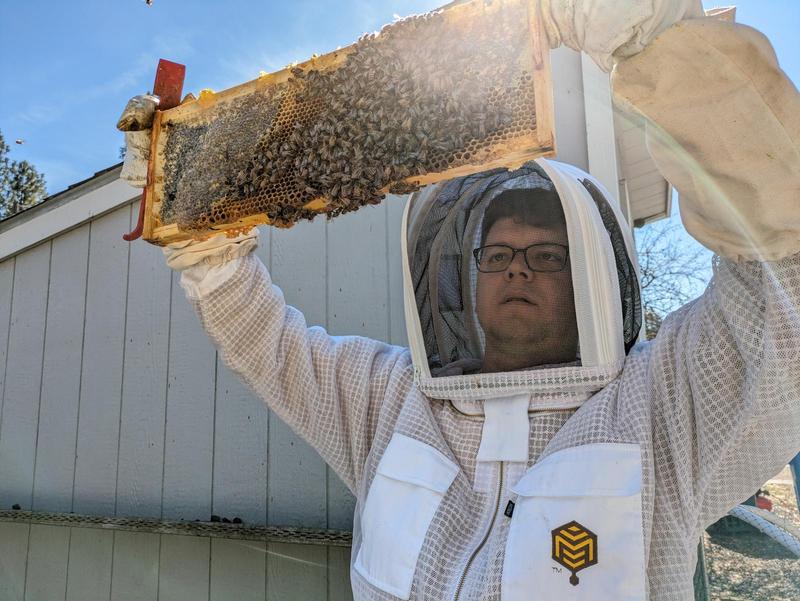
Splitting a hive
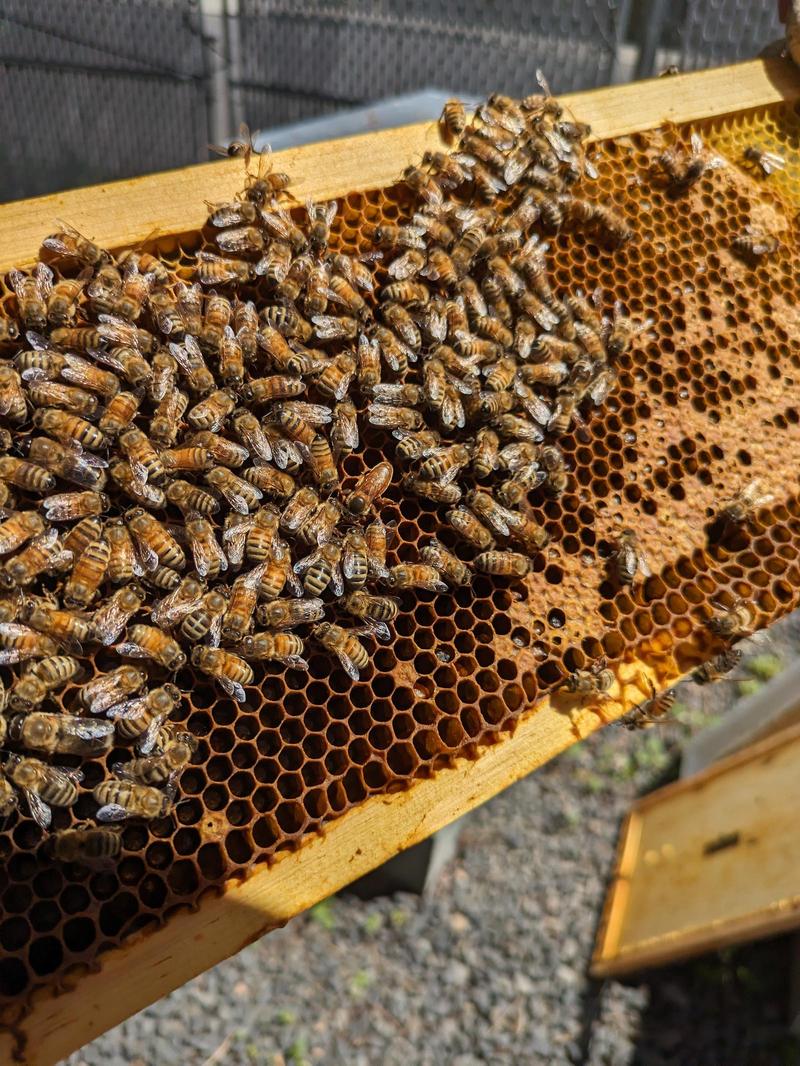
In late April, we went back to split Hive #4. That hive's queen was a superstar: she had filled all four supers in their hive with brood. They had eaten up their pollen patty; the queen was churning away. Since the hive was so strong, we pulled an entire super of brood and nurse bees, and put it in Hive #3. This is what is called a walk away split. The nurse bees, sensing the absence of a queen, should raise up a new queen.
Hives #1 and #2, which had seemed weak in March, were doing worse. One still had no brood, and no indication of raising a new queen bee—a bad sign. Could we save these hives, or, in their state of decline, were they victims of the winter, too?
What if we gave them a boost? Randy took two brood frames from Hive #4 for each weak hive. Maybe some extra baby bees would help those two hives recover. Or, if either those hives had lost their queens, the presence of eggs would allow the remaining worker bees to raise a new queen.
Checking on the split
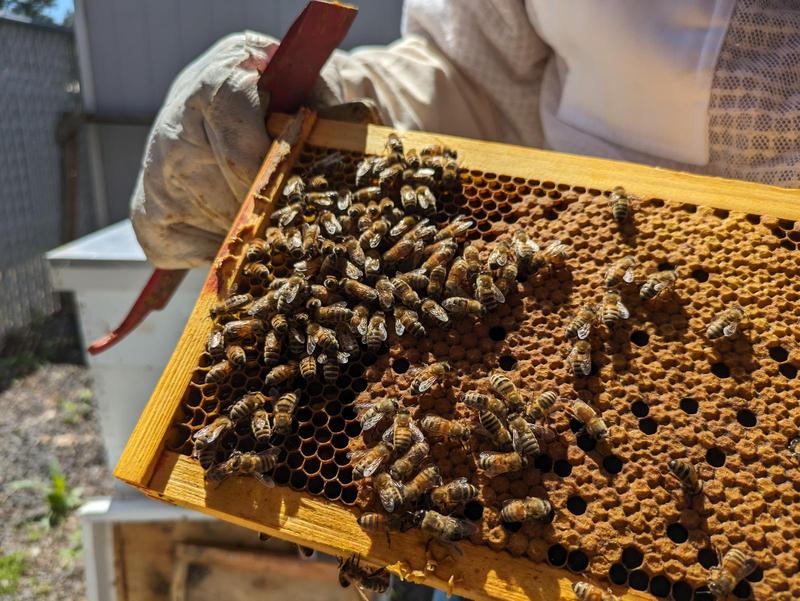
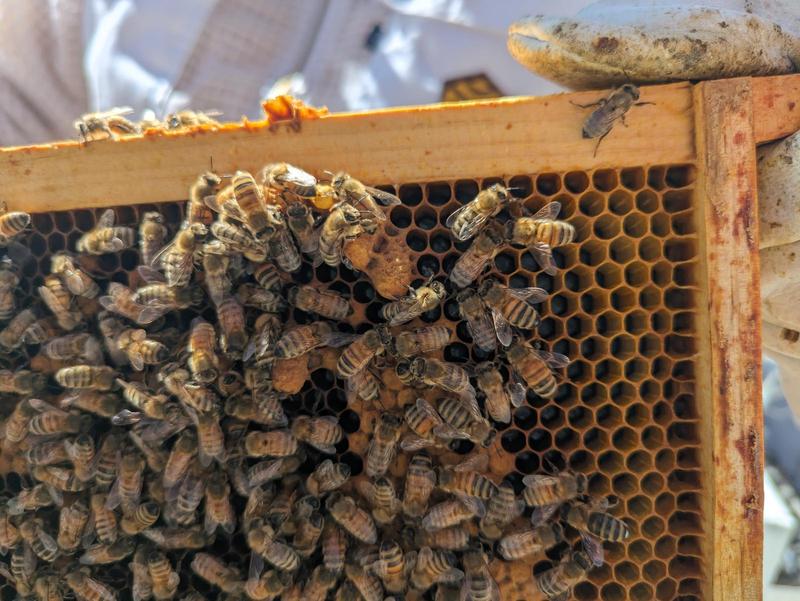
About a week later, we peeked in the hives again. We checked Hive #3, our split. We were looking for queen cells. Worker bees, when they no longer sense the presence of a queen (using pheromones), will raise a new queen by feeding a larvae "royal jelly". She gets bigger than a normal bee, so she needs a larger cell to grow in. Queen bee cells are recognizably larger than regular cells and protrude more from the surrounding comb.
We found four queen cells lined up on one frame, and two on another frame! Hive #3 was, therefore, following the proper course of requeening. This was promising.
Hives #1 and #2, on the other hand, were still not doing well. Hive #2 had pretty much fizzled out, even with the brood boost. Hive #1 was still active but wasn't in the process of re-queening, nor did it have any eggs or larvae. That was weird, because if there wasn't a queen, the workers would start the process of raising a new one (you can tell they're raising a new queen if you see comb in a special shape, because the queen needs a larger cell to grow in), and if there was, she should be laying.
It was time for another boost. We moved the frame of two queen cells from Hive #3 to Hive #1. Then, since Hive #4 was still churning away, we nabbed three more brood frames for Hive #2, attempting a second split to restart Hive #2.
Split success?
In early May, we found a new queen bee in Hive #3! Success! That said, we didn't see any eggs yet. Queen bees, upon reaching adulthood, will fly out of the hive in search of drones to mate with. After mating, they return to their hive able to fertilize all the eggs they'll ever lay, and never need to leave again. The lack of eggs meant our new queen probably had not yet gone on her mating flight. Once she successfully returned and started laying, then we could properly celebrate a successful split.
Hive #1 was still waiting on a queen to emerge. We saw a queen cell still present in the hive. Hive #2 hadn't built any queen cells, again. We nabbed a frame of eggs and young larvae from our strong Hive #4 so Hive #2 could try again to requeen. We will check on them again in a week or so…
Enjoying the bees—and the wax and honey!
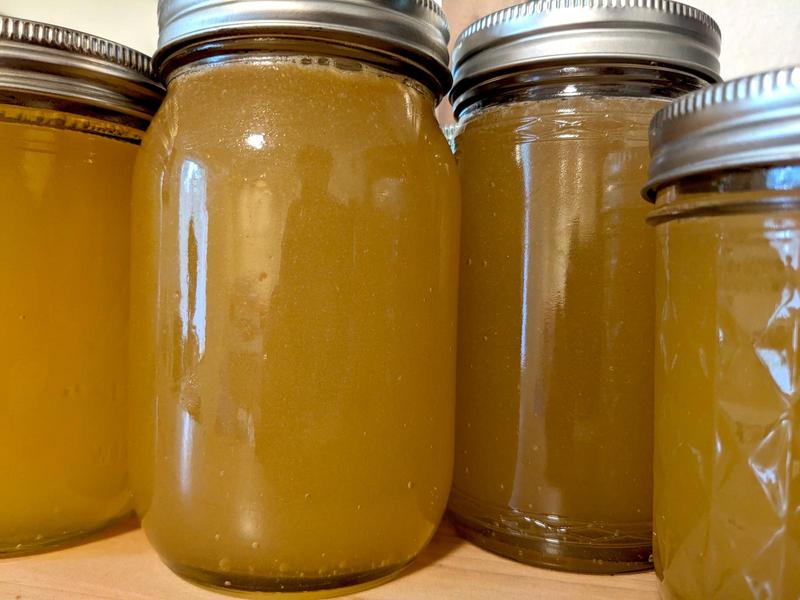
Ever since our honey harvest last summer, we have been eating a lot of honey! We had harvested around 7 gallons. We have been going through it! Honey on yogurt, biscuits, and oatmeal; in granola; with peanut butter on bread; in energy balls and in tea… it is delicious.
We didn't specifically try to harvest wax last year. We wanted the bees to keep most of the comb they made so that the next year, they could put more energy into making honey than on making wax. But we did collect some: little bits scraped off the supers during hive inspections (usually built out between the supers, getting in the way), plus some larger chunks collected when uncapping cells to extract honey. Most of this wax sat around until spring, when I got around to rendering it.
Rendering the wax
The rendering process was surprisingly straightforward:
- Obtain an old pot from the thrift store, and an old stainless steel mixing bowl.
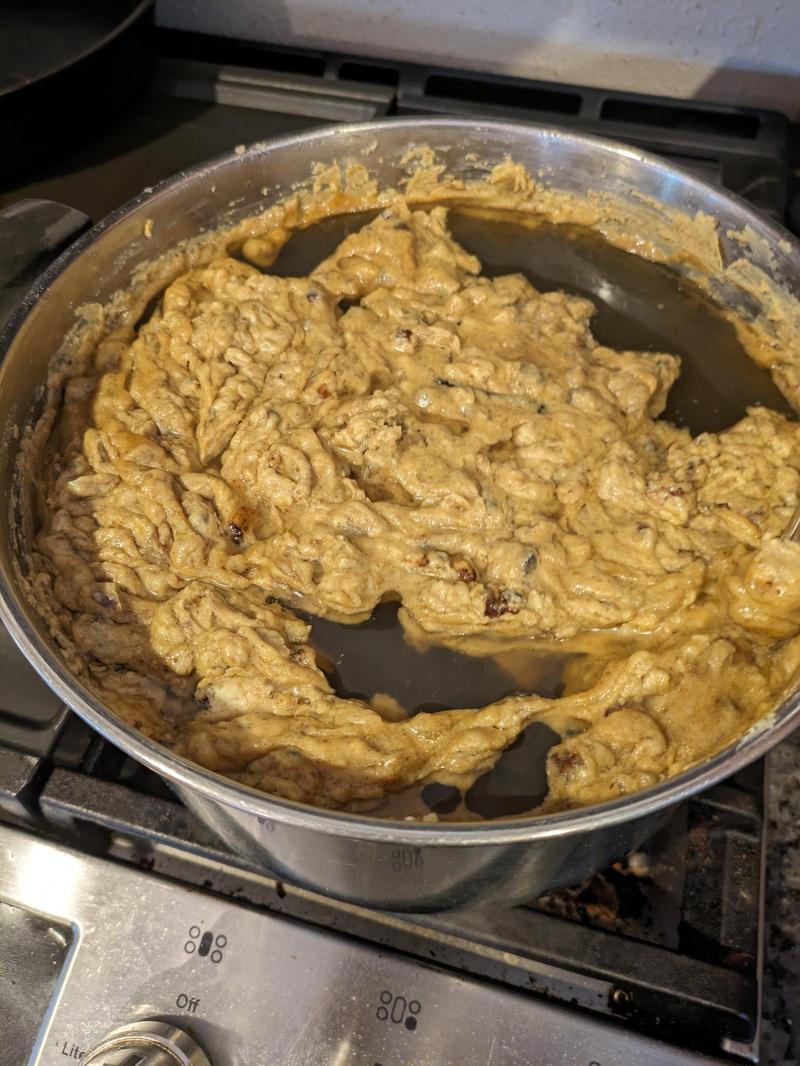
- Put beeswax (complete with drips of honey, dead bees and other debris) into the pot.
- Fill pot with water.
- Put on stove on low heat until the wax melts, stirring periodically with a utensil you don't mind getting waxy. It'll melt around 140-150 F. Don't let it get much hotter than that, as Iv'e read it'll lose some of that beautiful honey aroma.
- Carefully dump the pot (water and melted wax and debris) through a strainer into the mixing bowl. For a strainer, I used an old flour sack towel. Other people have used old t-shirts, fine cheesecloth, or even coffee filters.
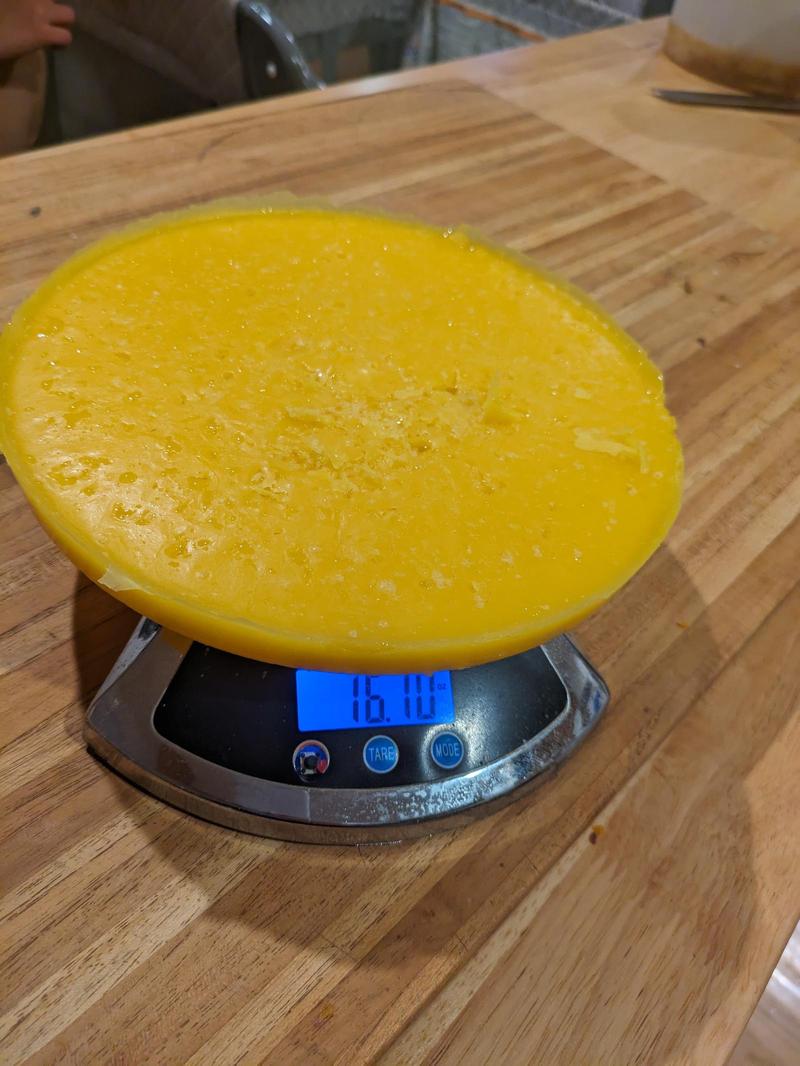
- Let cool. The wax will float to the top of the water and harden into a nice yellow lump, which you can then fish out and use for projects.
- If you don't think it's refined enough, repeat the process and or use a finer strainer. Many impurities will stay in the water when the wax re-hardens, too.
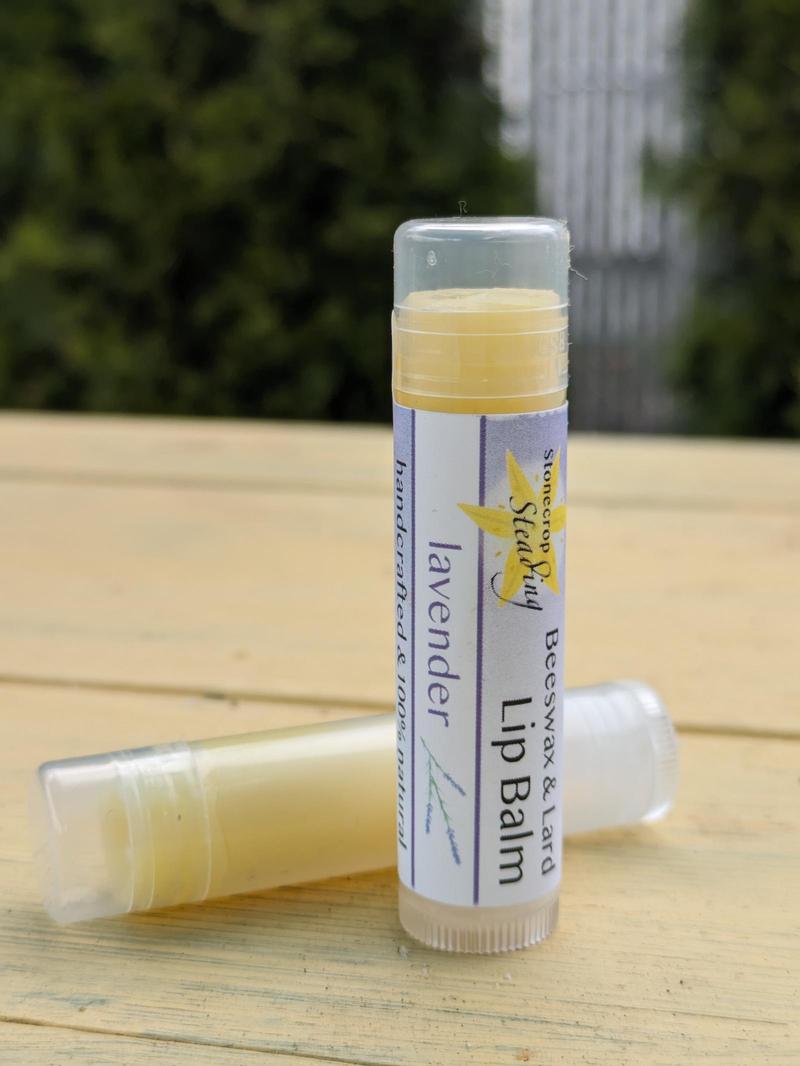
Beeswax lip balm
I also made lip balm! I looked up a couple recipes, and adapted them based on the ingredients I had on hand. The important thing seemed to be the ratio of wax to solid fats/oils to liquid fats/oils, and even that varied with the exact fats/oils used, since they all have slightly different properties and melting points.
For my fats/oils, I used coconut oil, olive oil, and lard (rendered from pig fat from a friend). Then, some of our beautiful yellow wax, and lavender essential oil. Voila!

Book Review: Uncertain: The Wisdom and Wonder of Being Unsure by Maggie Jackson