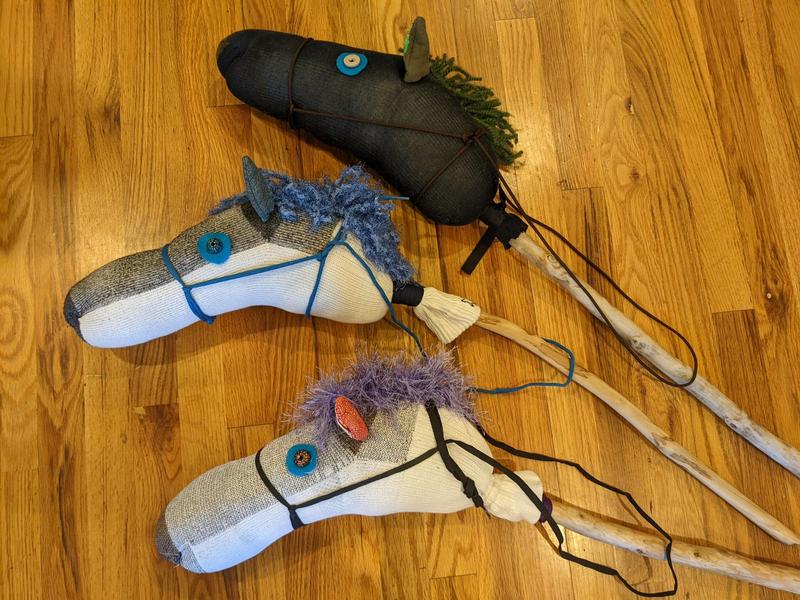
Tutorial: How to Make a Hobby Horse from a Sock and Scrap Fabric in 7 Steps
When the weather hits 100+ degrees for days in a row, there's only so many times I can take the kids to the lakeside beach. So, when it's too hot—like in winter when it's too cold—we do more indoor crafting and making!
This week's project was hobby horses. I'd been meaning to make these for a while. Our one-year-old currently loves horses. His older siblings have been pretending that sticks are horses. Making hobby horses is a perfect upgrade!
(Related: How to Consciously Be a Role Model in Creativity, Curiosity, and Crafting for Children)
Materials
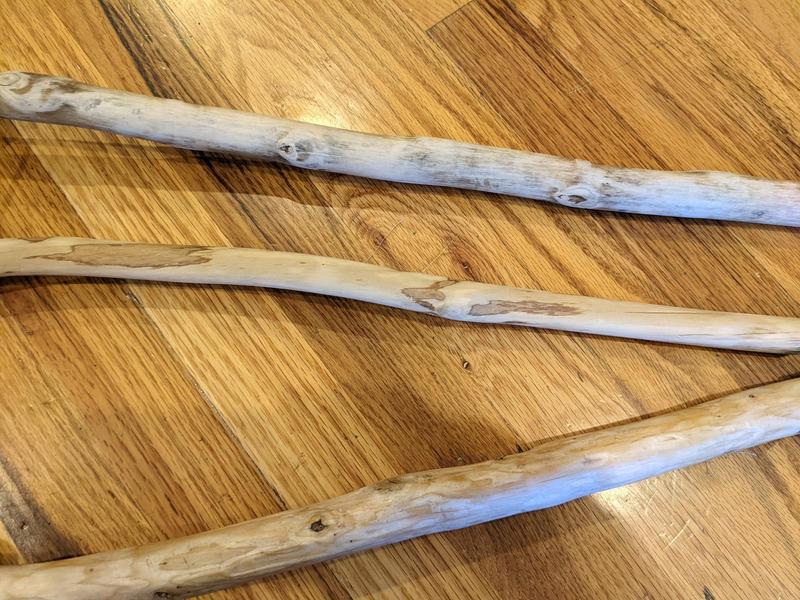
Stick- A sturdy stick, about three feet long
- Optionally, clippers for trimming any remaining twigs from the stick
- Carving or bushcraft knife
- Sandpaper, 80 grit and 150 grit
- A large sock, ideally without holes (but you could patch them)
- A smaller sock, okay if it has a hole or two
- Stuffing and/or old rags
- String or cord
- Scissors
- Scrap fabric or felt for ears
- Buttons or large beads for eyes
- Needle and thread
- Yarn for the mane
- Rope, cord, or old shoelaces for halter and reins
Step 1: Prepare stick
Use the clippers to remove any small twigs from the stick. If the stick is too long, use a saw or large yard trimmers to cut it down to size.
Remove the bark from the stick with the knife.
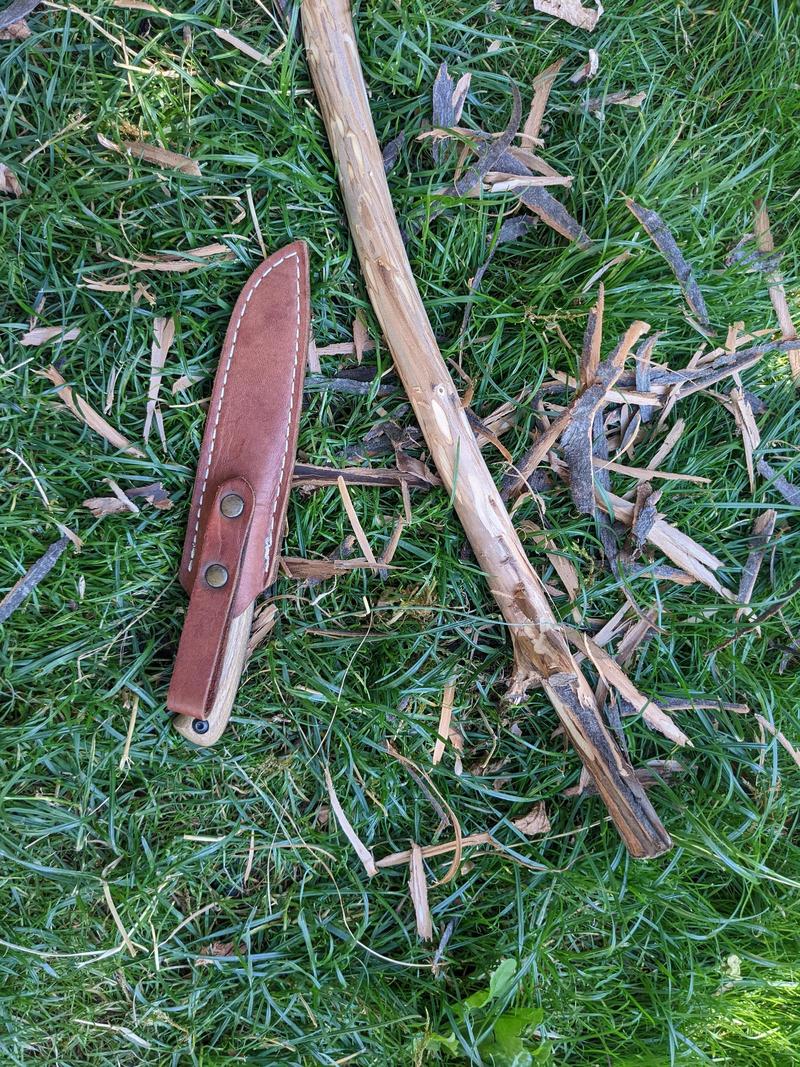
Sand the stick smooth with 80 grit sandpaper. When it has no bumpy edges or pokey bits remaining, switch to 150 grit and make it silky.
Optionally: give the stick a coat of polyurethane. (We skipped this, but it could be nice.)
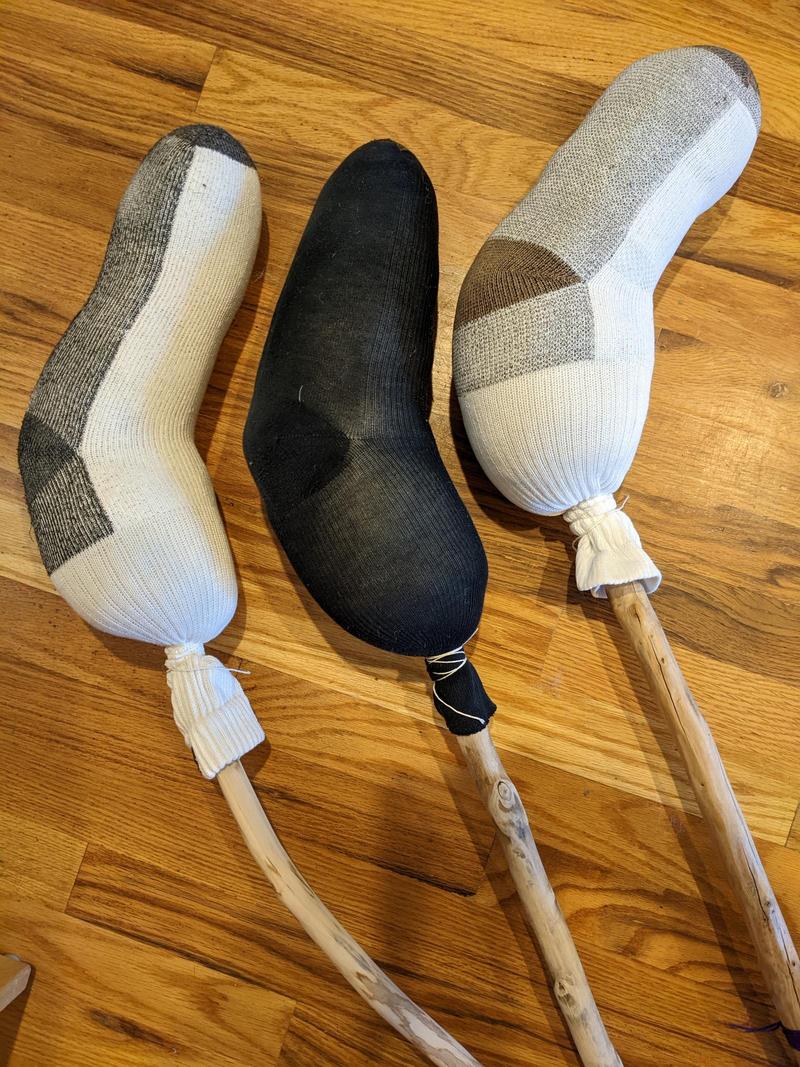
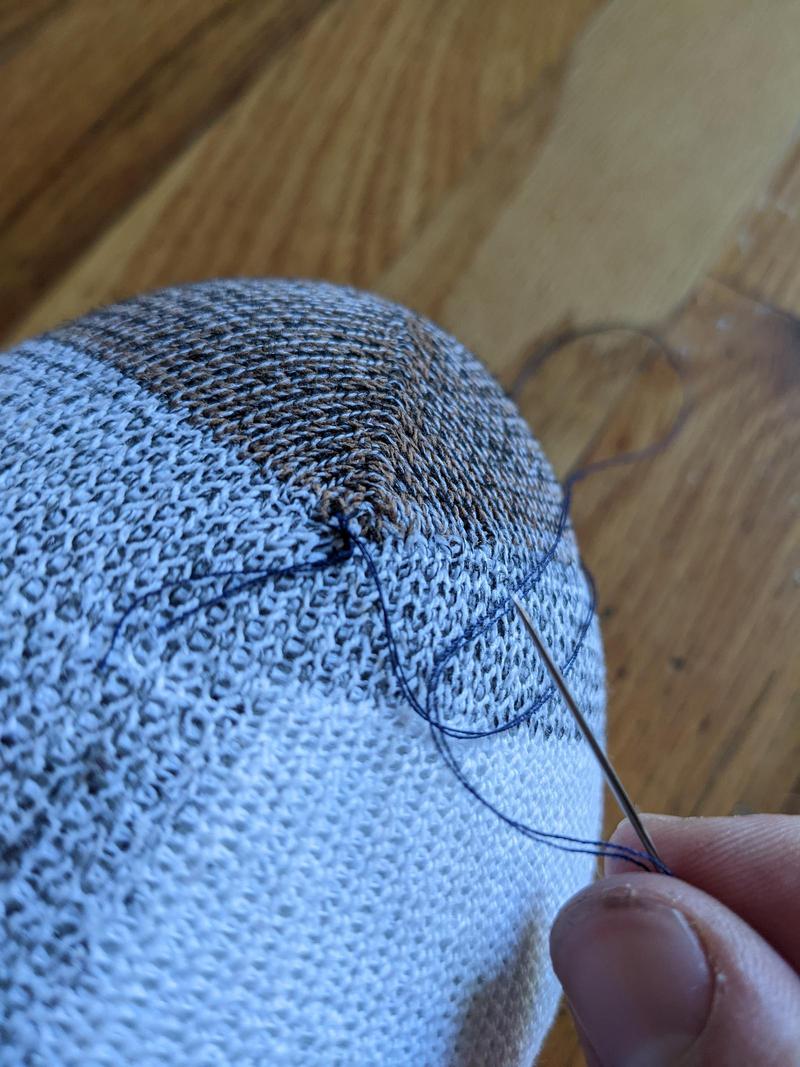
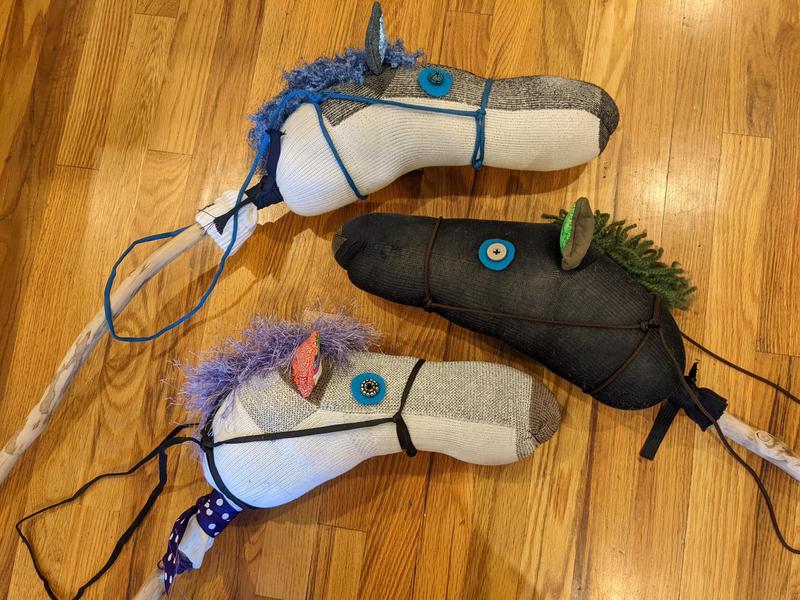
Step 2: Make the horse head
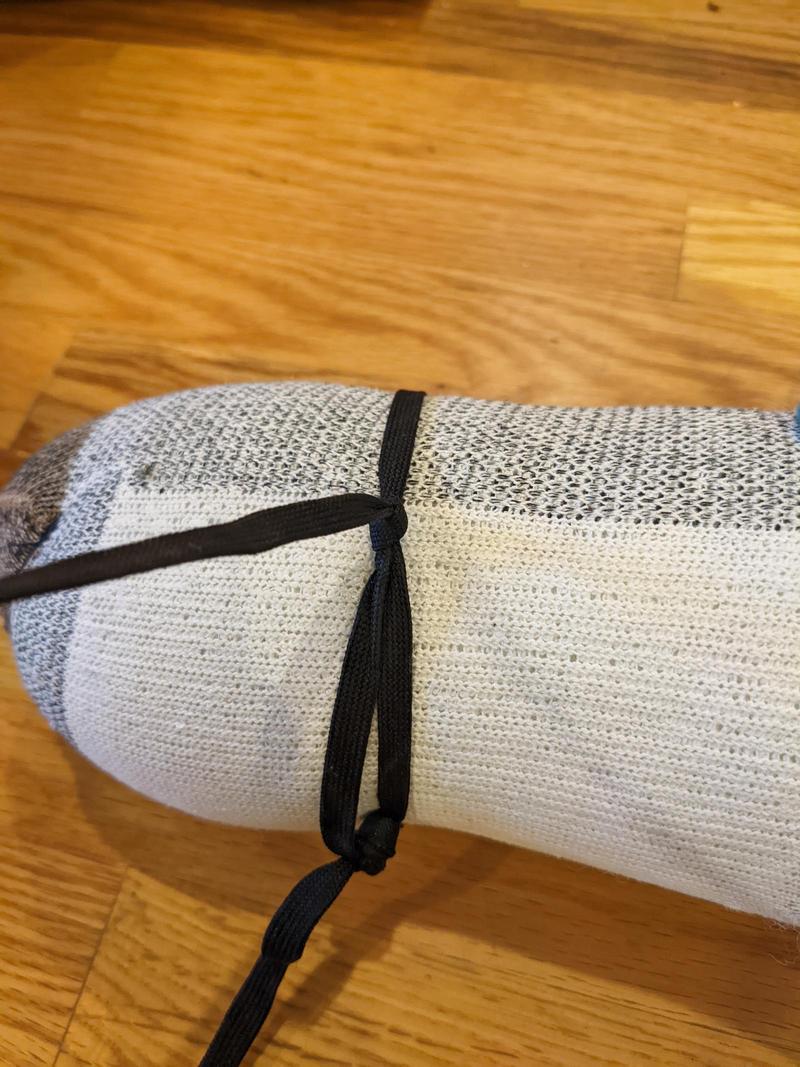
Put a few handfuls of stuffing in the small sock. Put this over the horse end of the stick, and tie tightly in place with the string or cord. This will help keep the stick from poking out of the horse head.
(Too many old socks? Make a sock rug!)

Fill the big sock halfway with stuffing. Stuff it to the seams!
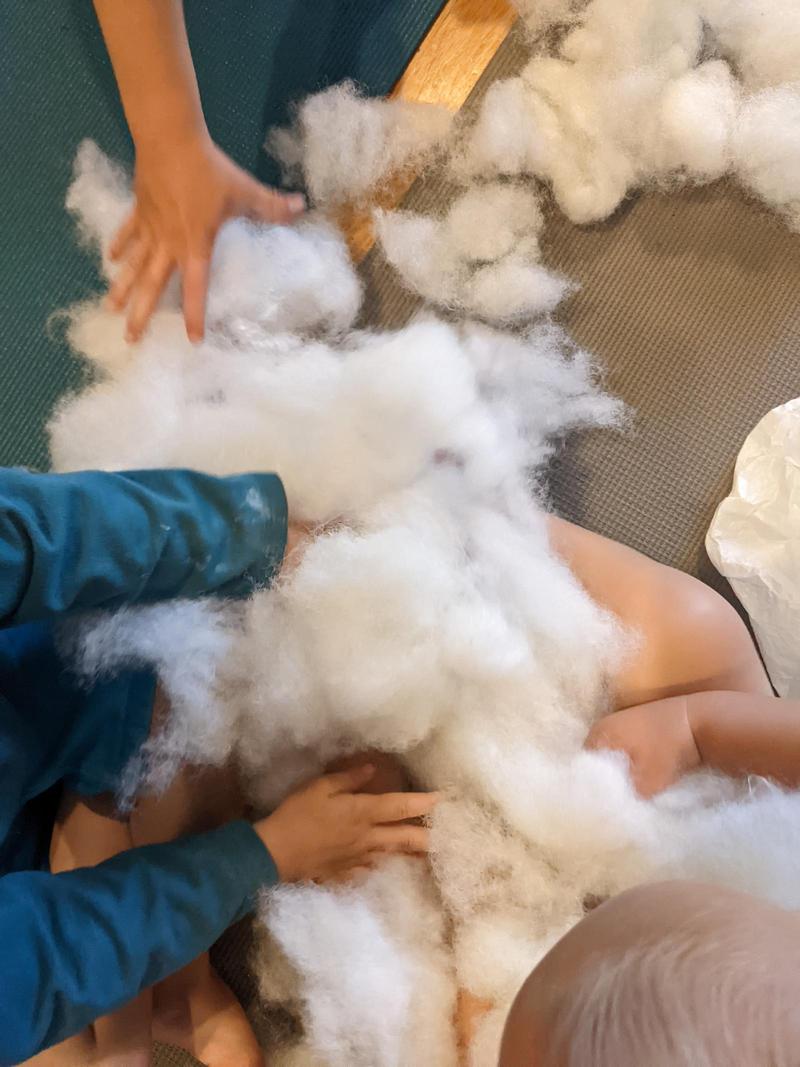
Put the big sock over the small sock on the stick, at least up to the heel. Add more stuffing. Try to center the stick in the horse head. Stuff more. When there are only a couple inches of sock left, tie off tightly with string or cord.
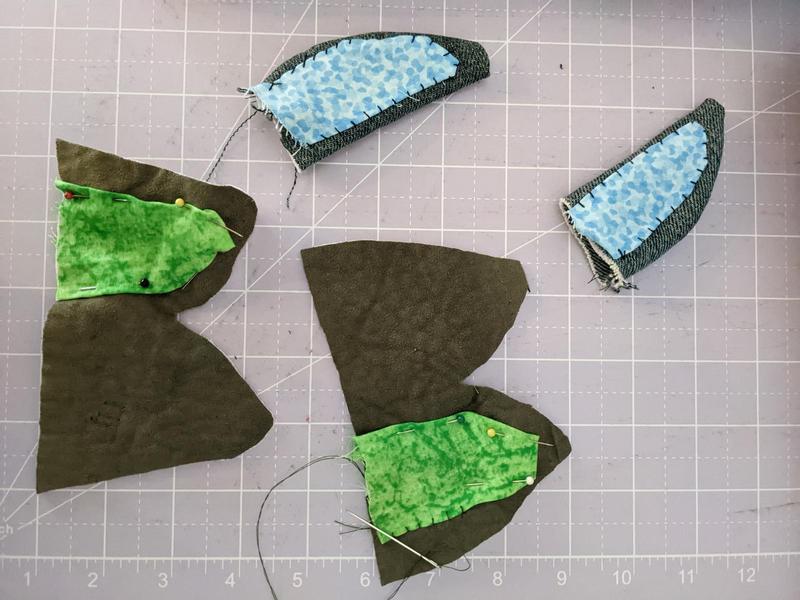
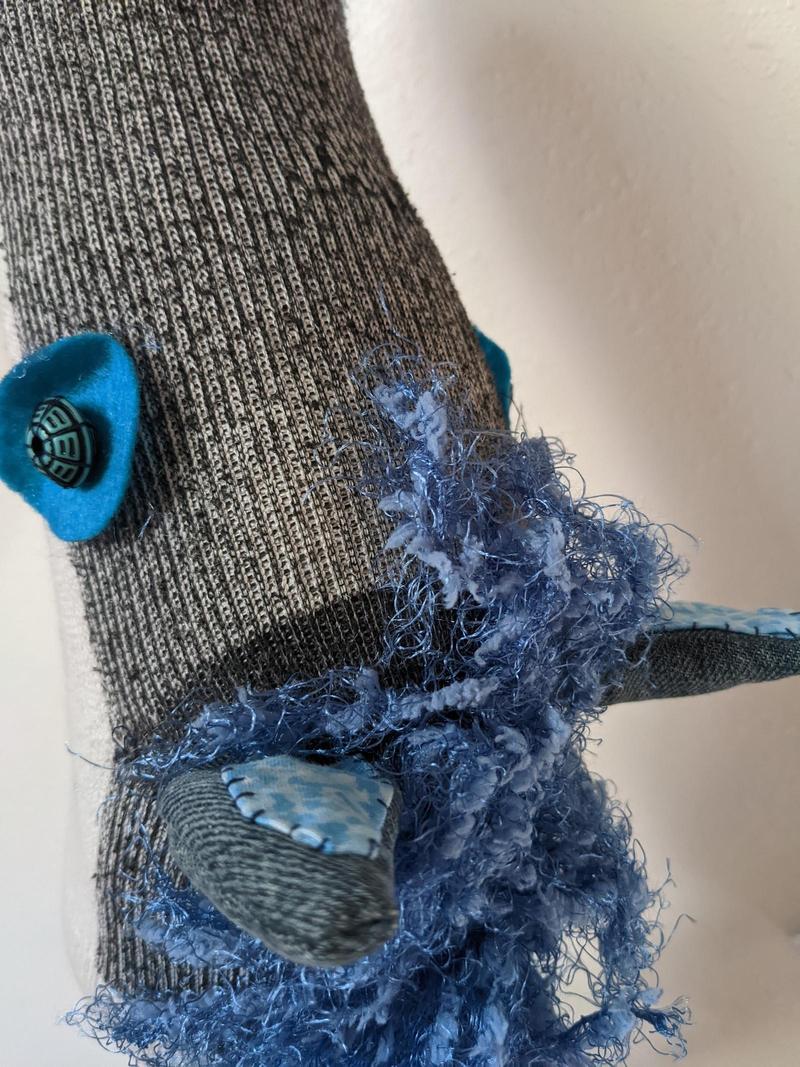
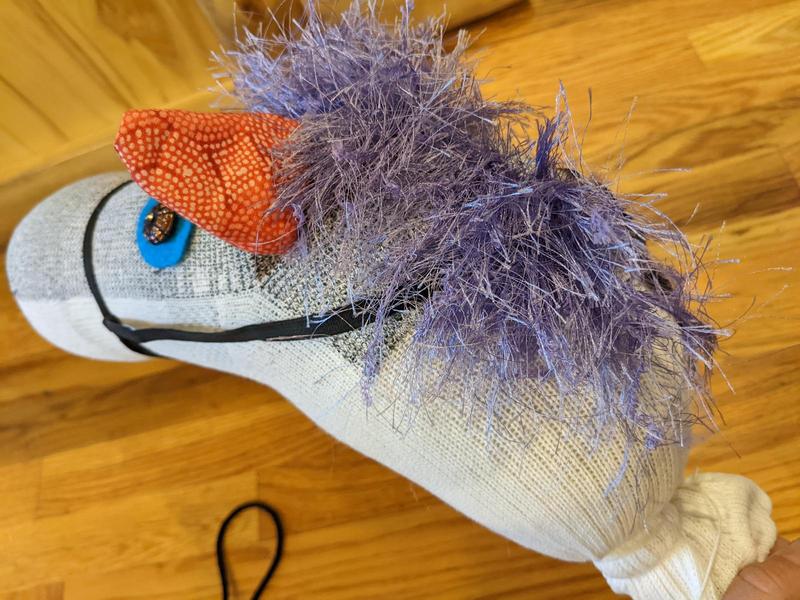
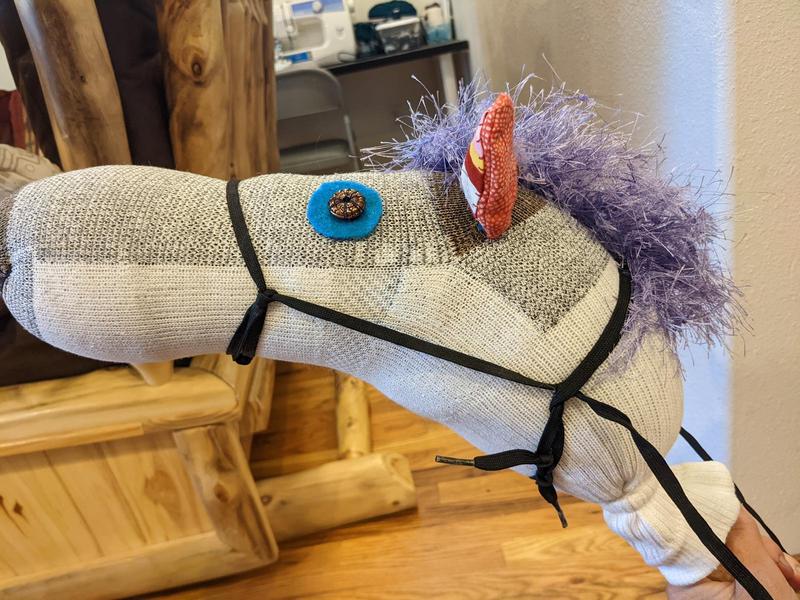
Step 3: Add ears
Cut four ear-shaped triangles out of scrap fabric, large enough for a 3/8-inch seam allowance, for the ears. In contrasting fabric, cut out two slightly smaller triangles for the inner ear. Sew a contrasting triangle onto an ear triangle, folding edges under for a clean seam. I hand-sewed this part.
Then, pin each front ear to each back ear, right sides together, and sew along the edges, but leaving the bottom edge open. I used my sewing machine, straight stitch, for this. Turn right side out. Repeat for the second ear.
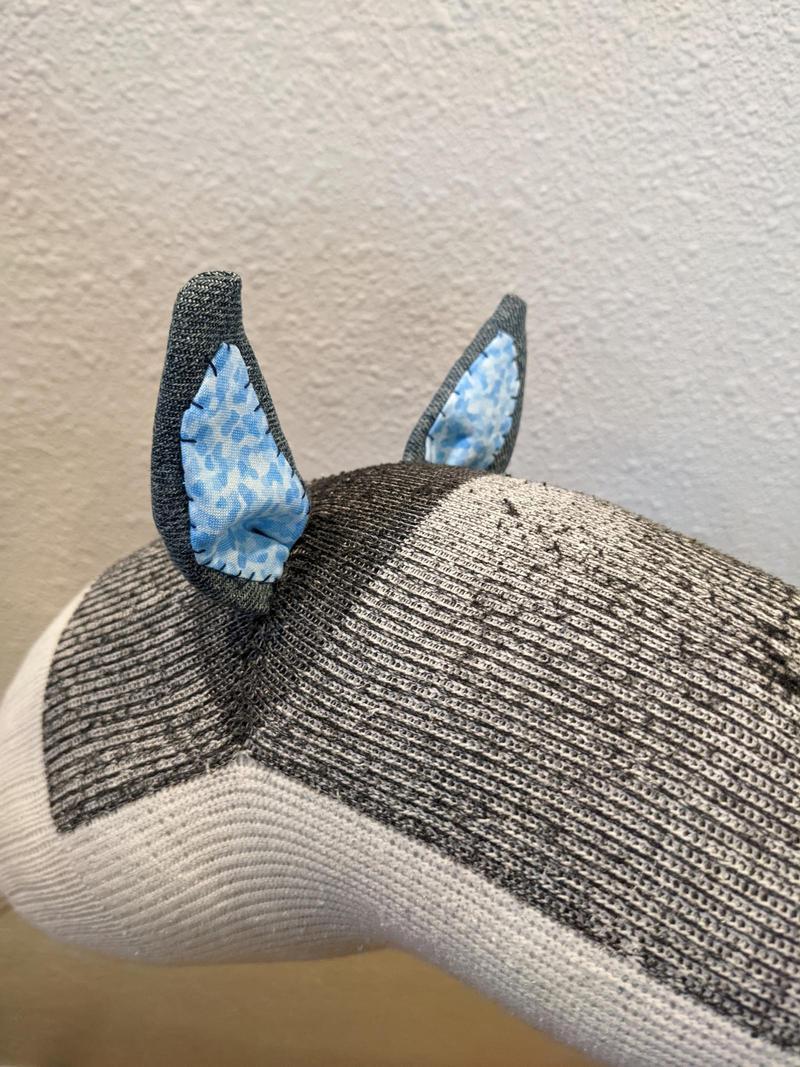
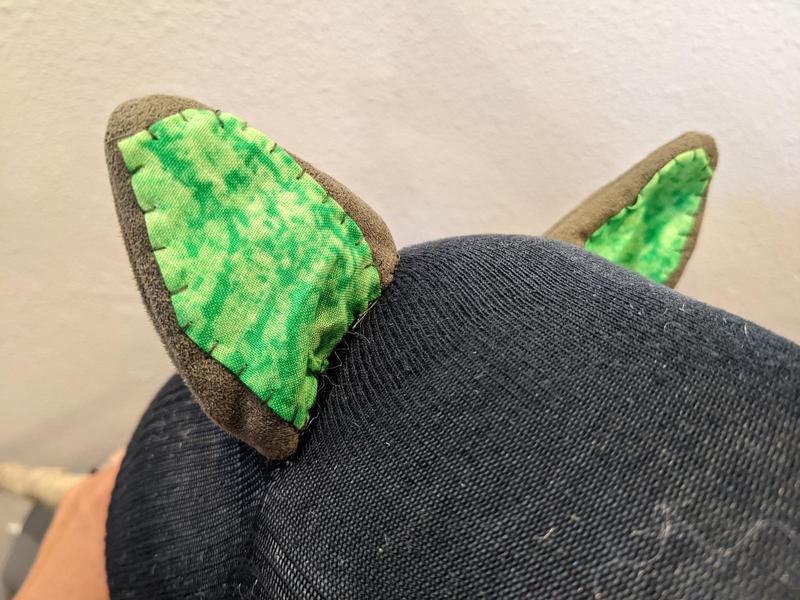
Sew the ears onto the horse head. Fold bottom edges up into the ear. To help the ears stick up, fold and curve the ear a little as you sew it on.
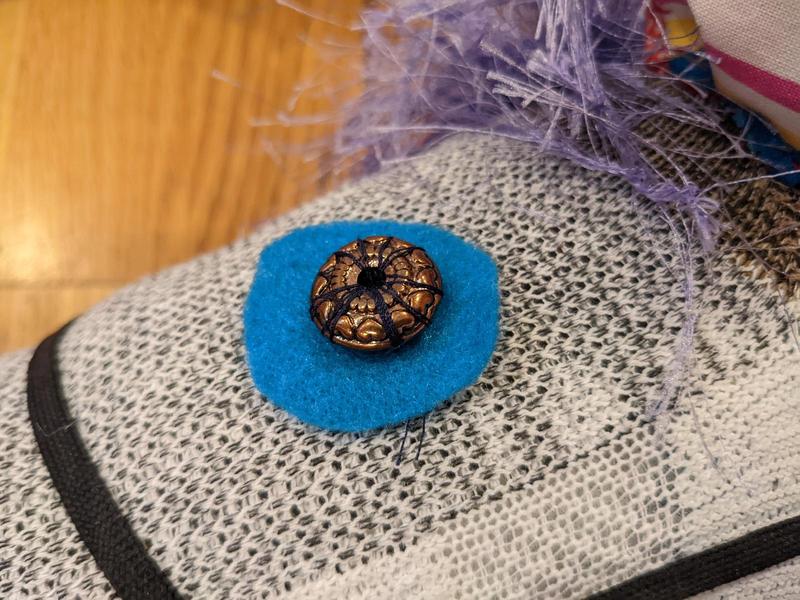
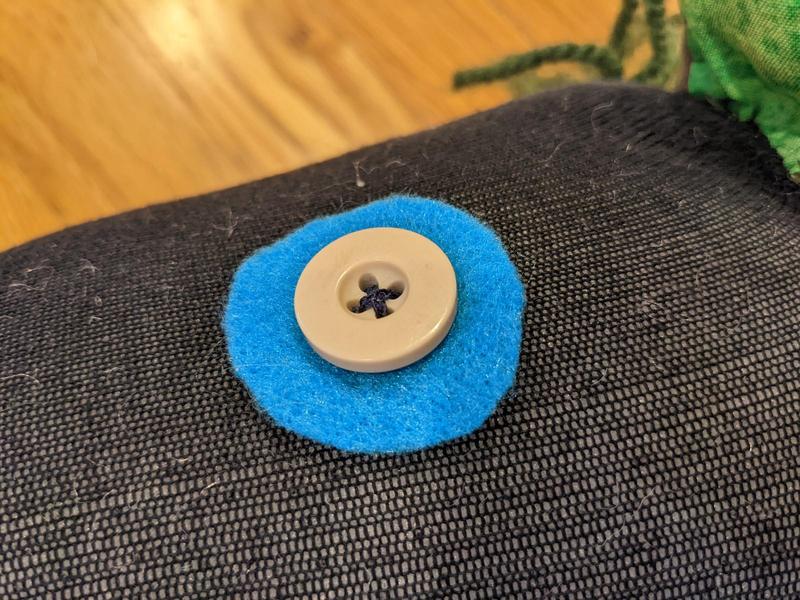
Step 4: Add eyes
Select a pair of large buttons or beads to use as eyes. If you'd like to get extra fancy and add definition to the eyes, layer a smaller button on top of a larger button, or cut a circle of felt or scrap fabric to place under the button.
Sew in place, taking care to be symmetrical about eye placement.
Step 5: Add the mane
Choose any kind of yarn you like for the mane. The hairy, fluffy ones went over well with my kids.
Find a book. Wrap yarn vertically around the book once, then horizontally a bunch of times.
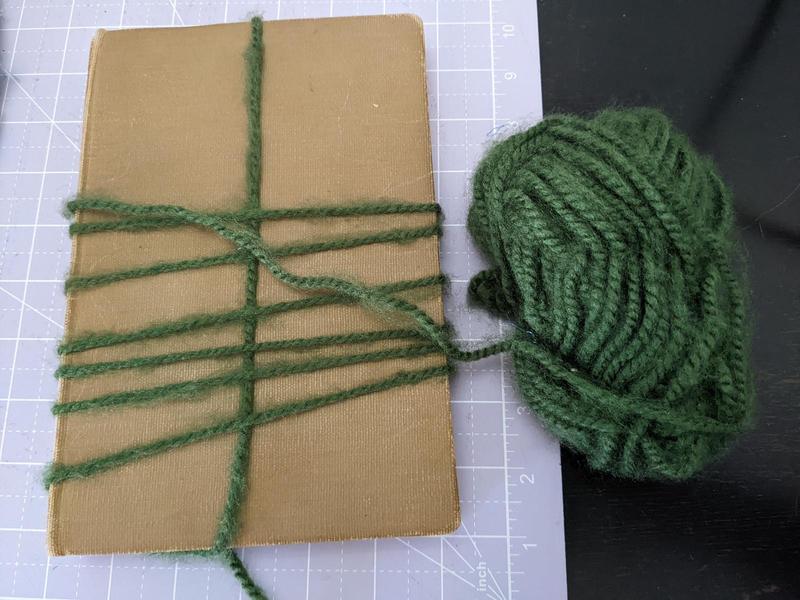
Cut along the sides of the book so you have a bunch of smaller strands laying over the vertical. Tie the vertical ends together to make a loop over the strands.
Then double knot each strand onto the vertical, thus making a line of hairs—the mane. Making the vertical a loop means none of the strands knotted on can escape; it adds some durability to the mane.
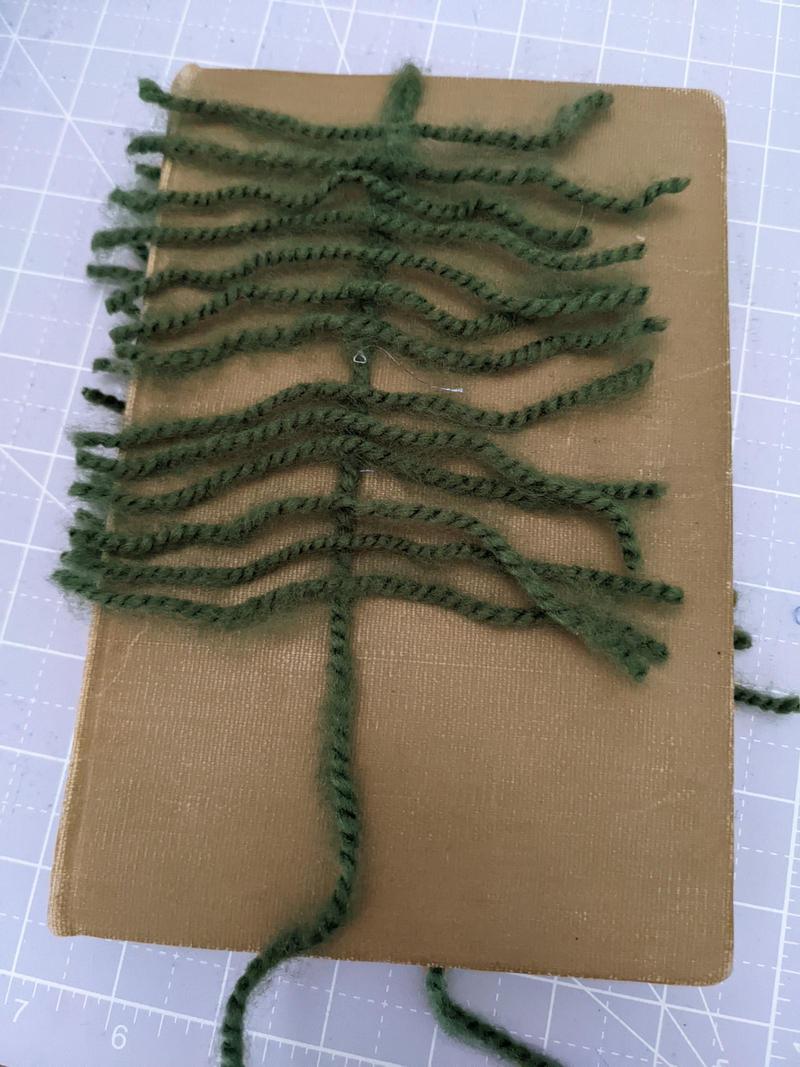
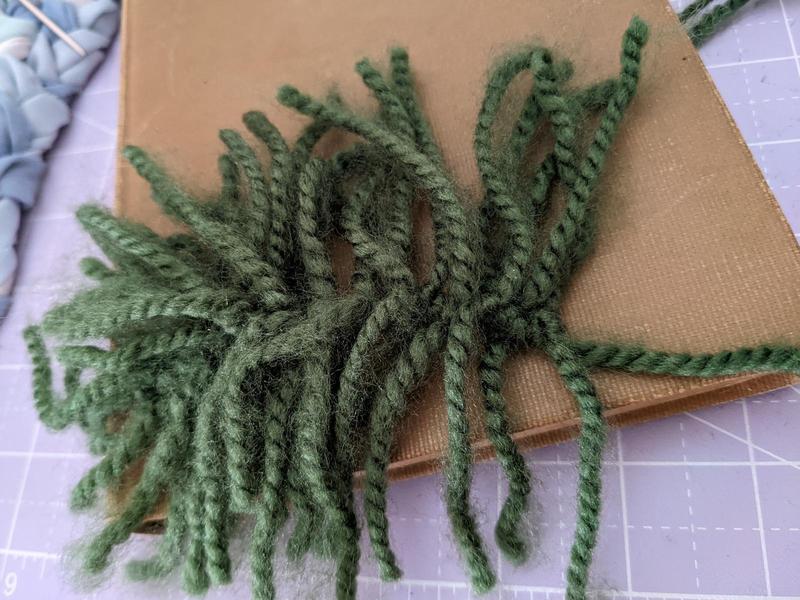
Sew the mane in place. This can be tricky since the yarn strands get everywhere and you don't want to sew those in place, just the vertical strand. Line it up so some of the mane comes between the ears, like on a real horse.
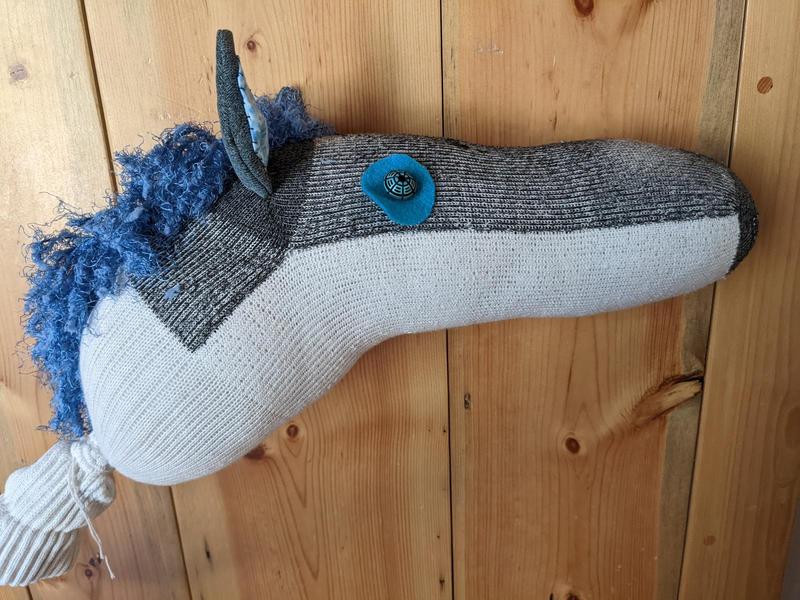
Step 6: Add mouth
Put a length of thread on your needle. Sew a large knot at one side of the mouth.
Push the needle through the horse's snout and out the other side; pull tight and make another knot to hold the pucker.
Then bring the thread around the front to make a smile. Pull tight and sew a knot to hold the smile in place. You can do a second pass back across the smile and knot again on the other side for durability.
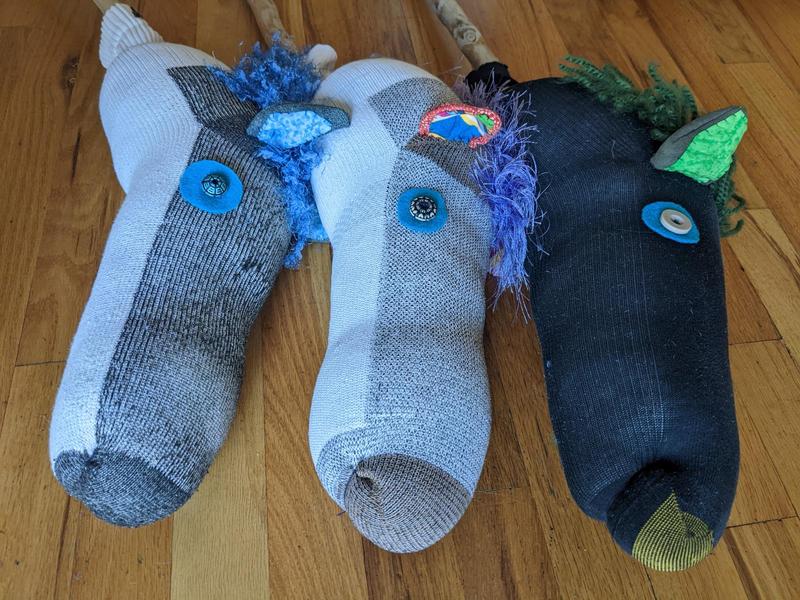
Step 7: Attach reins and decorate
Use rope, cord, or old shoelaces to make a halter and reins. I used old shoelaces.
This is the no-sew way to add a decent halter and reins. If you'd like something that looks better and has fewer knots, go ahead and sew!
Fold the shoelace in half, loop around the horse's nose, and tie a knot at the bottom.

Take one lace up to the side of the horse's nose and tie a slip knot at the side of the nose, so that the halter comes back along the horse's cheek. Do the same on the other side.
Thread one side of the halter under the mane, and tie to the other side.
Take the second shoelace and tie it onto the later behind the ear.
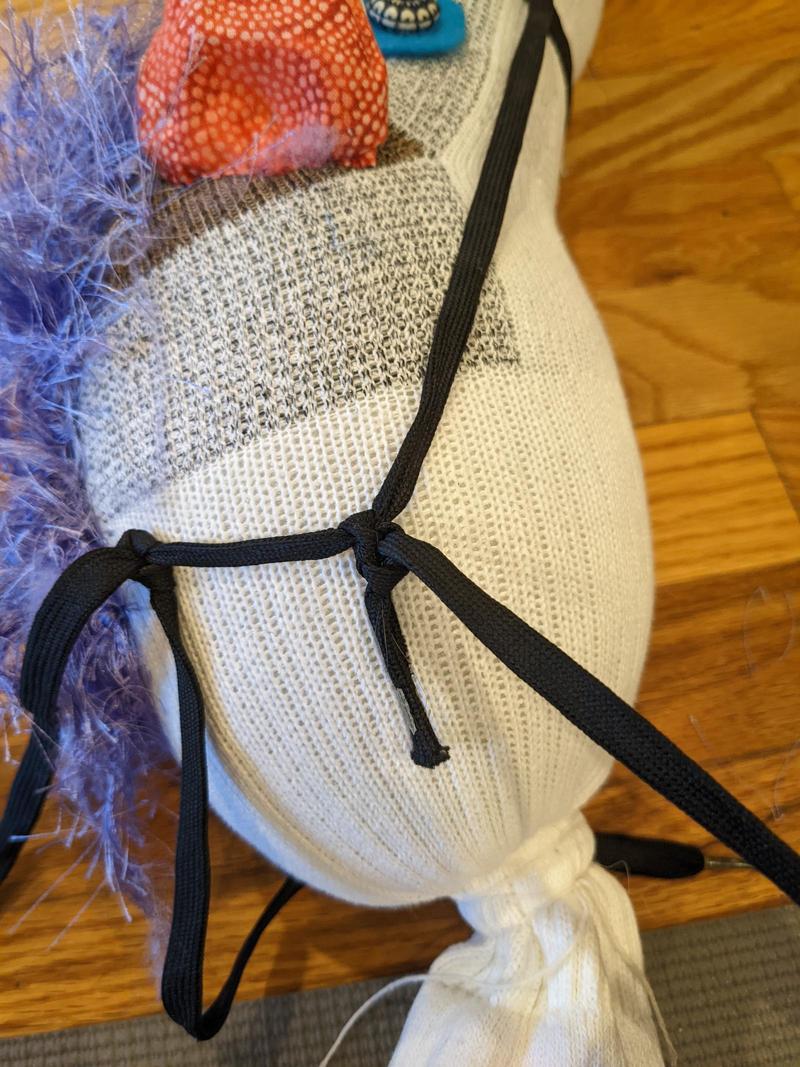
Loop it under the horse's neck and tie onto the other side of the halter.
Then tie the loose end of the shoelace at the first knot on the first side of the halter, making the loop for the reins.
Again, I didn't sew any of this. I may decide to change how I tied them later, since on a real horse's halter, the reins attach near the nose, not behind the ears. But the kids wanted to ride their horses straightaway, so we'll stick with it for now!
If you like, add a piece of decorative ribbon at the neck, at the base of the sock, to cover the string that holds the sock onto the stick.
Book Review: A Little Way of Homeschooling: 13 Families Discover Catholic Unschooling by Suzie Andres