Garden Year 7, 2025: Starting Seeds, Blocking Soil, Interplanting, and More
Every year in the garden, I want to learn something new. I want to improve at least one thing and do at least one thing a little better than the previous year. There is so much to learn! Soil health, starting plants, watering, pruning, pests and diseases, preservation and recipes. It can be overwhelming if you try to learn everything at once. So I try to learn a little each year.
Read about my gardening journey so far:
- 2019: How we built garden beds
- 2019: Year 1: a 200 sqft garden!
- 2020: Year 2: What I improved
- 2021: Year 3's plan, dealing with pests, how it went, and why and how we preserved food
- 2022: Year 4's plan for planting, and how it went
- 2023: Year 5's plan with a bunch of new garden beds and a new seed starting setup, and how everything grew in the bigger space
- 2024: Year 6's plan, and how it went: with more tomatoes and flowers!
Spring: Soil Blocking
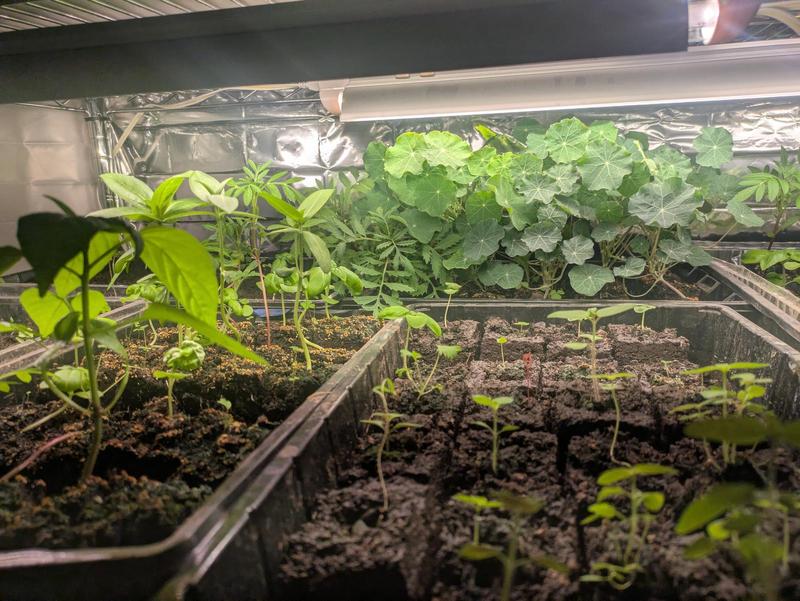
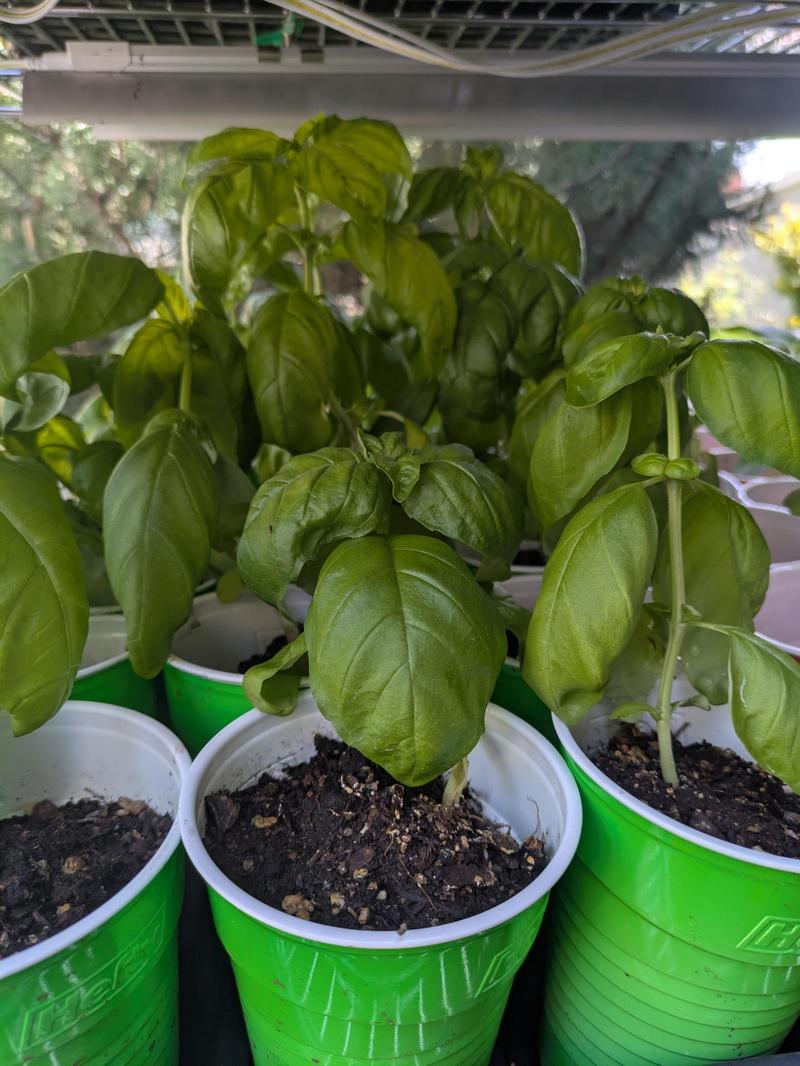
This spring, one of the new things I'm learning is soil blocking. Soil blocking is a method of starting seeds first championed by Eliot Coleman, an organic farmer in the northeast. Instead of filling lots of plastic seed trays with soil, you use a blocker to make a bunch of individual blocks.
I got two soil blockers: one 3/4" and one 2", so we can easily pot up the little ones. I considered also getting a 4" to put up the 2-inchers in, but from my reading it seems people have mixed feelings on that. Some prefer to use 6" pots or just make mud ball with their hands. If I decide I need it, I'll buy one next year.
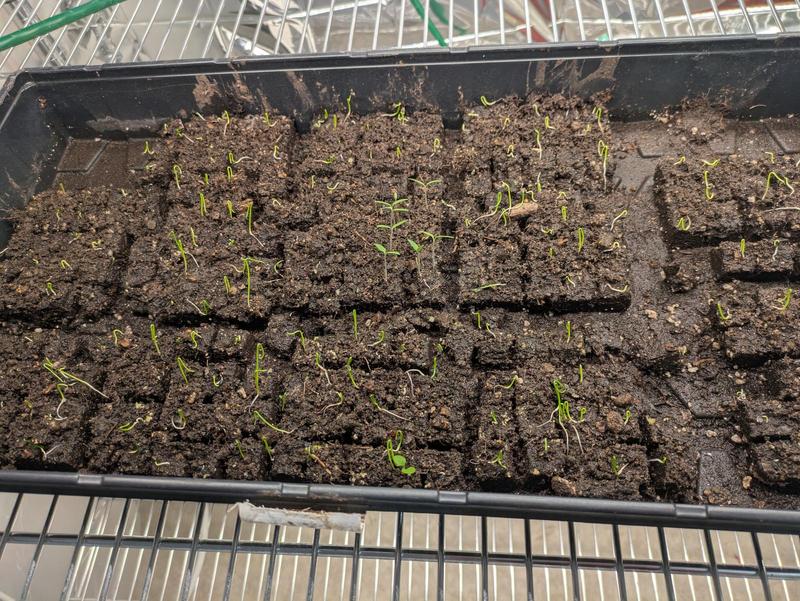
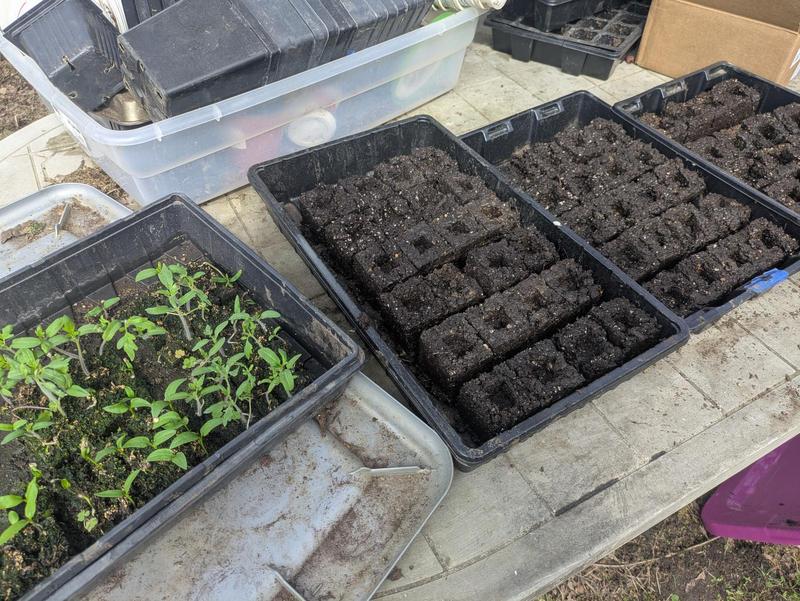
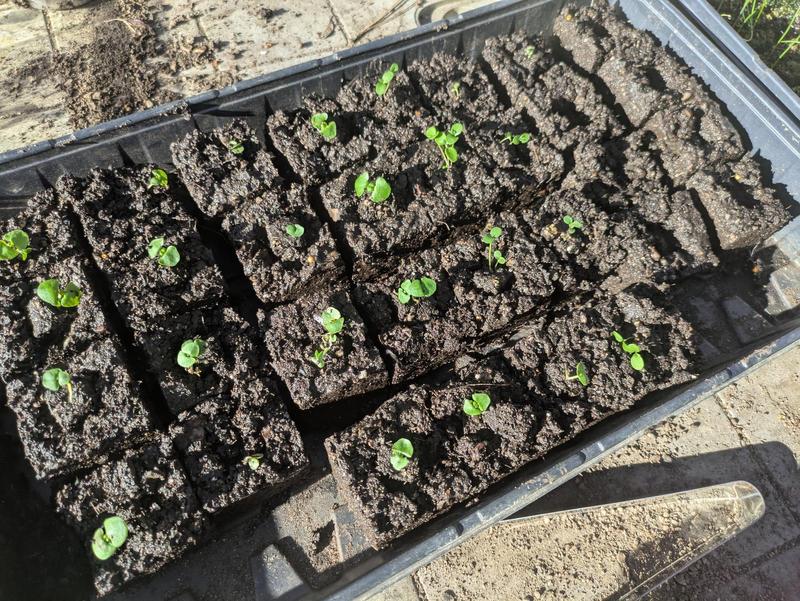
For now, I love the blockers! I mixed up some soil, nice and wet, following approximately Eliot Coleman's recipe, but modified to use the fertilizers I had on hand, and using up a bit of leftover potting soil from last year. The little blocks are really quite small. It's easy to fit a ton of them on a small tray, making it easy to accidentally start too many plants. They germinate great. And they transplant into the 2in blocks easily, so there's that, too.
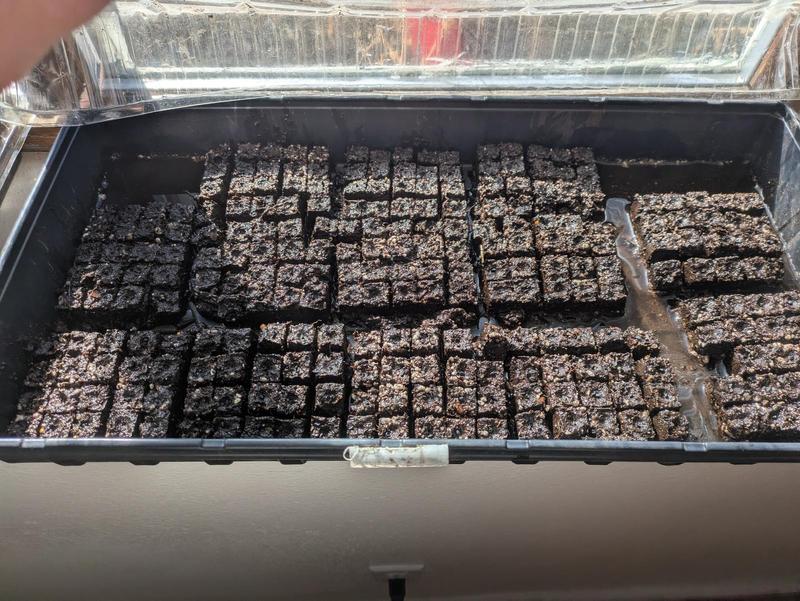
The tricky thing was that since the blocks are so small, they tend to dry out quick. I had to remember to add water to the tray every day, and ideally, maybe even twice a day. Which, granted isn't that unusual; I would have to water seed trays in previous years pretty much everyday anyway.
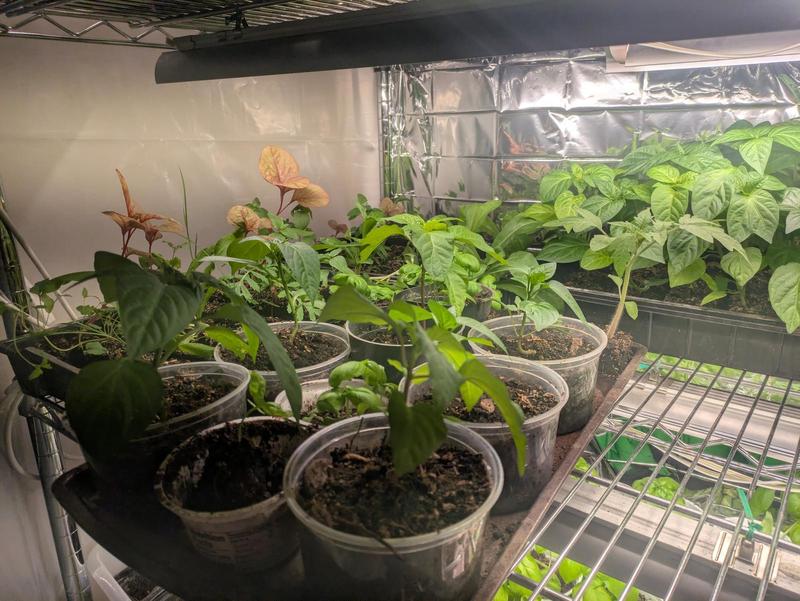
Fortunately, I still had plastic lids for a couple trays, so I could capture some of the humidity, help the blocks not dry out as fast, and help the seeds warm up. I set the first two trays of little blocks on a sunny windowsill, since we hadn't quite perfected our new shelf setup….
Once the shelves were ready, I moved all my seedlings there.
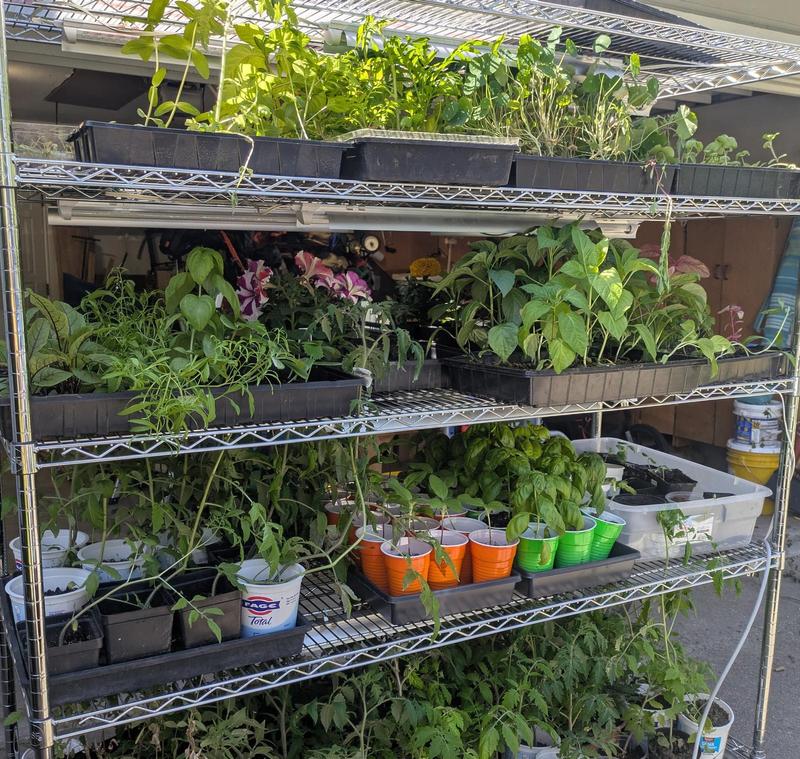
The new shelf setup
For the last two years, I took over half our entryway with a large metal shelf on wheels (large: 5' long by 2' deep and 6' tall). Our entryway has tall south facing windows so it was a good location in some respects…. But also, it was in the way for months, and in easy reach of a highly mobile baby with a penchant for grabbing green leafy things. This year, we thought it would be nice to try moving the seed starting setup out of the house.
I was originally thinking about a smallish greenhouse space. We don't have enough land for a larger greenhouse for year round growing or in the ground beds. Instead, it would function mostly as an early season extender. One of my primary goals with a greenhouse area would be a dedicated space for starting seeds, potting up, hardening off, and generally getting my plants going, since I have limited space indoors. Randy suggested we try a garage setup this year, since it would get the plants out of the way. I'd be able to open the garage and wheel the plant shelves outside in nice weather. They'd be closer to the garden, too, when it was time to plant. It would also be easier to heat a little section of the garage than a freestanding greenhouse.
So that is what we are trying! We have a section of garage along the wall shared with the house set up so the shelves slide in. The shelves are metal, with the grow lights hanging from the underside of each shelf. We hung 6mil plastic sheeting from the ceiling down to the floor, overlapping at the front so we can get in and get the shelves out. We also added a sheet of mylar along the back wall to reflect back the grow lights. Randy fixed up an old electric wall space heater and set it on one of the bottom shelves, and that keeps it toasty.
Watering the plants is easier now, since I can bring the hose around to gently water larger plants, or quickly fill the watering can for carefully adding water to the block trays.
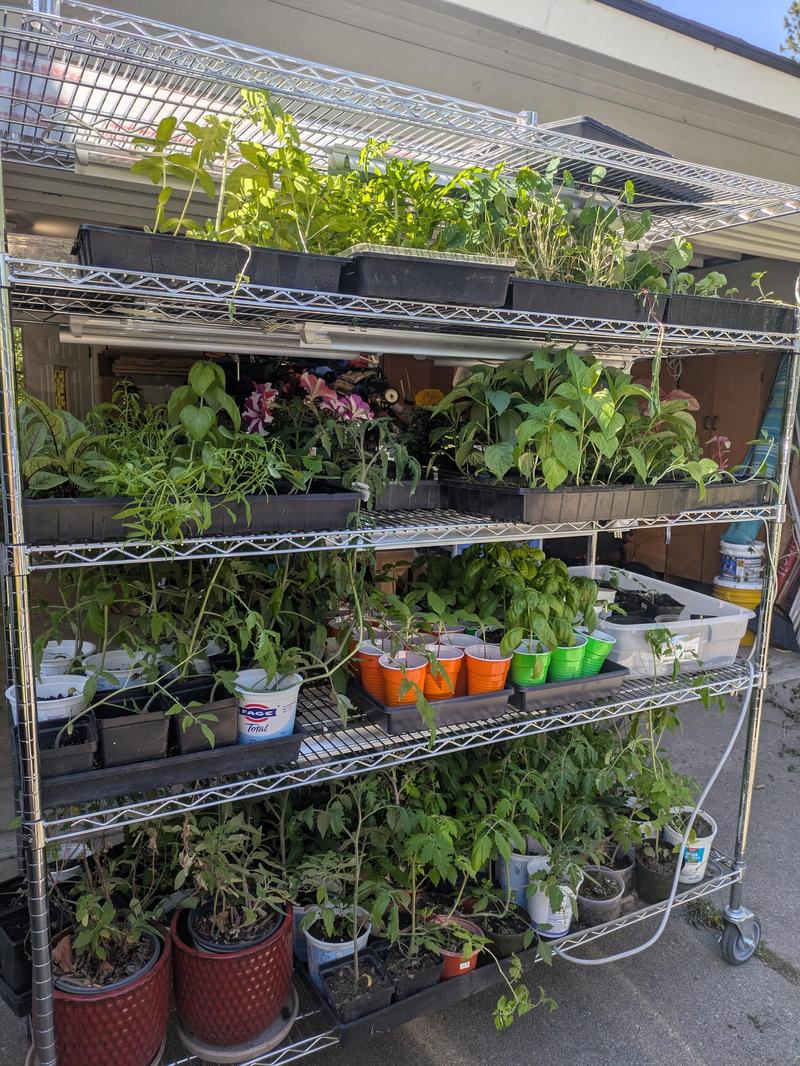
We have a small thermometer tracking the temperature, and it has stayed plenty warm, even in March. I have it set to the high 70s/low 80s. It doesn't seem perfectly consistent. I haven't tested the setup in extra cold weather. By the time we had the shelves and heater set up, we were in the first false spring, and the cool days after barely hit freezing.
Relevantly, this setup isn't the cheapest. The heater runs most of the time and it's not the most efficient heater. Next year we may revisit our heating plan. For instance, I may get a heat mat for germinating seeds, or a better space heater. Maybe we'll add insulations or a second layer of greenhouse plastic. If it doesn't sufficiently solve my problems, we will revisit the greenhouse idea and iterate as needed. For now, however, it's nice to have a dedicated spot for my seedlings that is not in my entryway!
Interplanting and succession planting
One of my goals this year is to improve succession planting and interplanting.
In February, I read Miraculous Abundance by Perrine and Charles Herve-Gruyer, which includes detailed descriptions of their interplanting and succession planting techniques. One of the Herve-Gruyers' most successful plots (in a greenhouse) produced over $200 of produce per square meter per year. Wow! Two years ago, I got 500 lbs of tomatoes from around 32 square meters, which, if you assume organic tomatoes might sell at $5/lb, comes out to about $75/square meter. The productivity of their plots is amazing.
Reading that book inspired me to double down on filling the garden to the brim. In previous years I have had the goal of improving my succession planting skills, but in reality, I have managed a second planting of peas and beans and not much else. But many crops could warrant a second or even third go—especially if I plant some shorter crops like lettuce or radishes, and if I actually get them in the ground in spring like I'm supposed to.
I have generally followed the square foot gardening approach to packing plants into my raised beds. I intersperse flowers among everything else and don't always divide beds strictly into this crop versus that crop. There's a little chaos in my gardening with some companion planting inspiration. I've planted corn and peas with my squash. I guess I need to sneak other vegetables in there too! For instance, the Herve-Gruyers' plant radishes around each cabbage, then harvest the radishes about when the cabbage starts taking up all the space.
As for succession planting, that is easier with a schedule…
Scheduling
This year, I got a new gardening book specifically about gardening in the inland Northwest. It has helpful scheduling suggestions. My favorite linked planting times to lilac bushes: when the lilacs are in bud, plant these; when they have leaves, plant those; wait to plant these until the lilacs are done flowering. Super useful heuristic given all the lilacs around!
To keep on top of my planting, I wrote out a schedule listing when to plant everything. When to start certain seeds, when to plant outside, when to start the next round for successive crops of some plants, and so on. I think this will help me actually get the most out of my garden space and stay on top of planting.
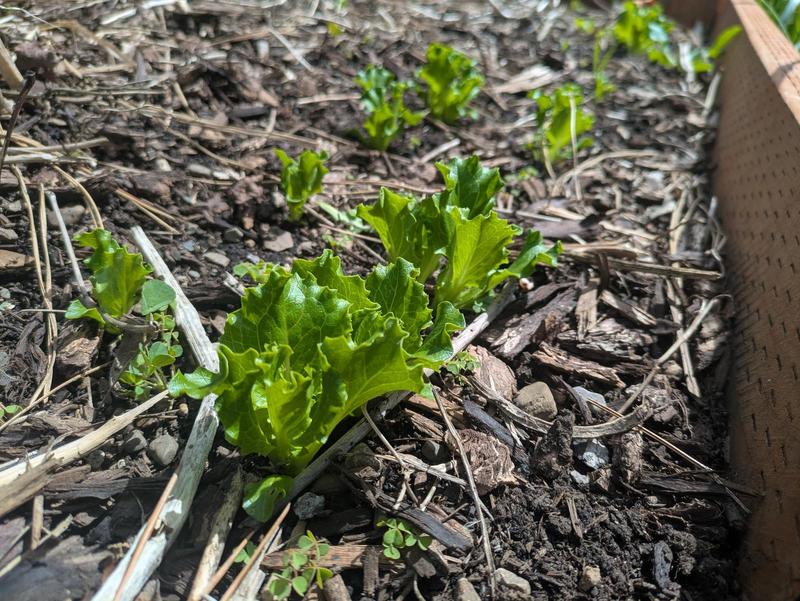
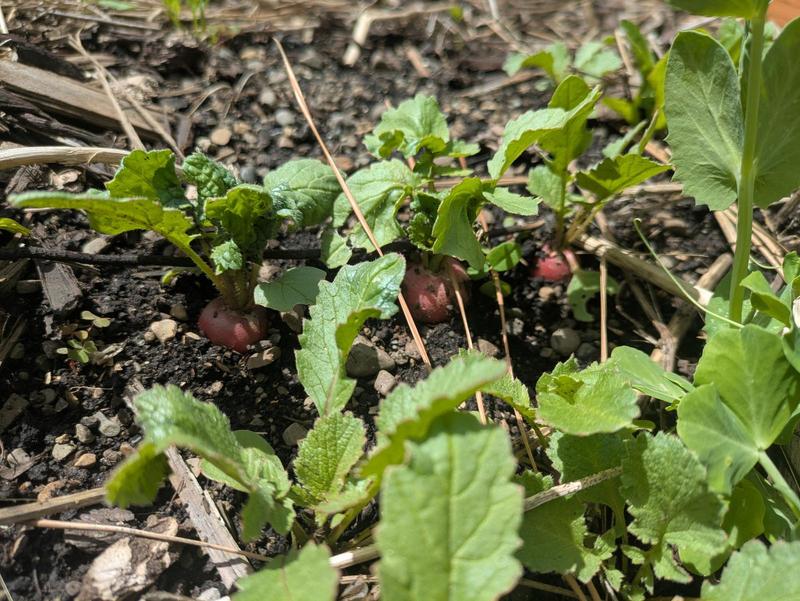
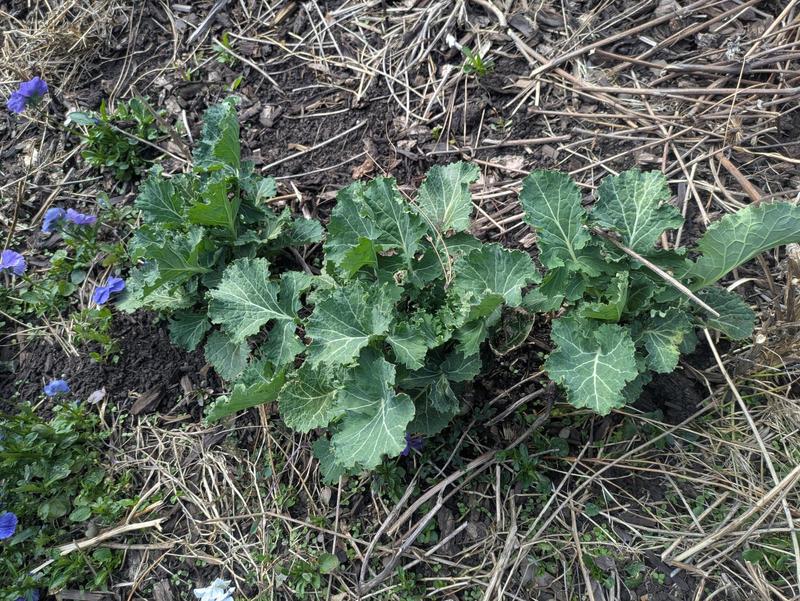
For instance, in previous years I've started seeds indoors but often haven't gotten around to planting anything outside until I'm also planting my starts outside in May. But there are many crops that are fine with cooler weather and/or are frost tolerant that could go out earlier. So this year, I planted various greens (lettuce, kale, arugula), peas, and roots (radishes, beets, carrots) in the ground at the end of March and through April. That way, some would be ready for harvesting by the time my peppers and tomatoes were ready to go in the ground!
So what am I planting this year?
We will have about the same variety of plants in the garden as last year. We have a couple new varieties of flowers and tomatoes to try, and some peas that are supposed to have purple pods. My 8-year-old picked out most of the new varieties. He's also planning on growing some flowers and produce to enter in the State Fair. Maybe I'll enter some produce, too! Wouldn't it be fun to be able to say I have award-winning tomatoes or rhubarb!
Here's a probably-not-complete list of what we have growing:
Vegetables and fruiting plants: onions (red, white, and bunching), a couple varieties of carrots, sugar snap peas, tomatoes (Amish paste, cherry, isis candy cherry, spoon, Barry's crazy Cherry, apricot zebra, white currant, black strawberry, costoluto, yellow, black krim, maybe one other?), pole beans, bush beans, some kind of purple beans, radishes, beets, celery, peppers(bell, some kind of purple pepper, jalapenos), kajari melon, early girl watermelon, zucchini, cucumbers,
Greens: kale, dock, lettuce mix, arugula, spinach
Herbs: basil, lemon basil, oregano, sage, chives, rosemary, dill, lemon mint, peppermint, spearmint, lemon balm, lemongrass, thyme
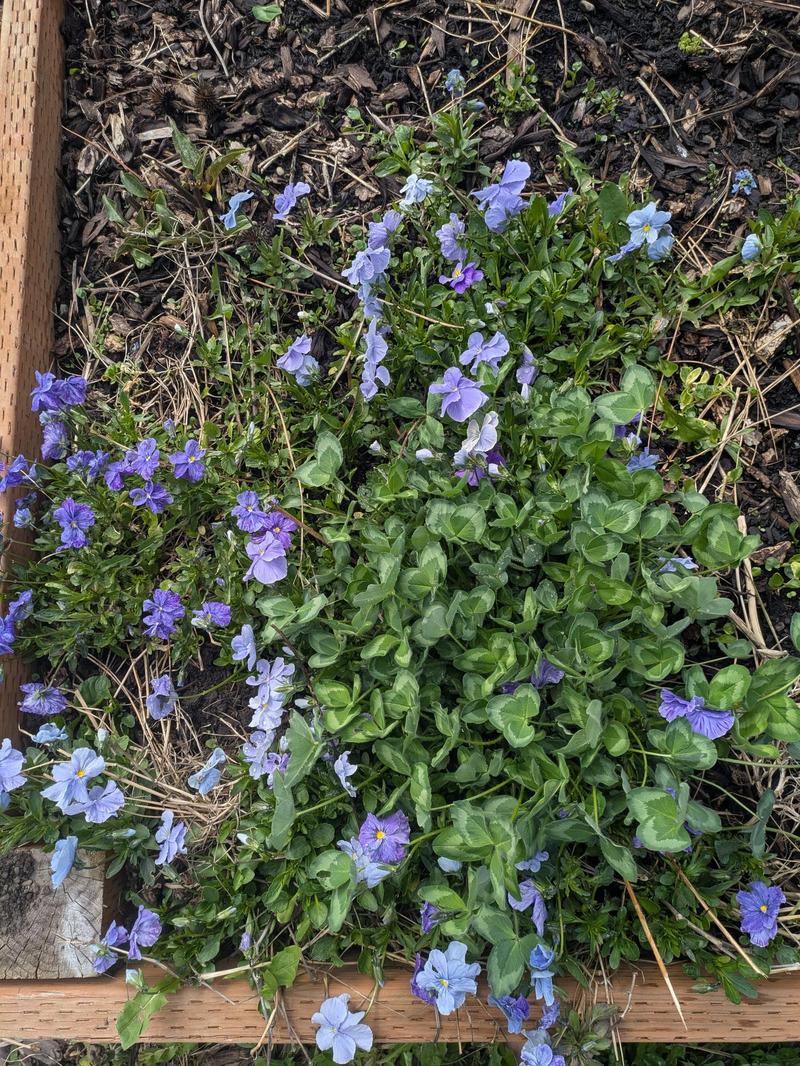
Flowers: zinnia, calendula, red clover, china asters, alyssum, marigold, petunia, nasturtiums, pansies, and all the perennials
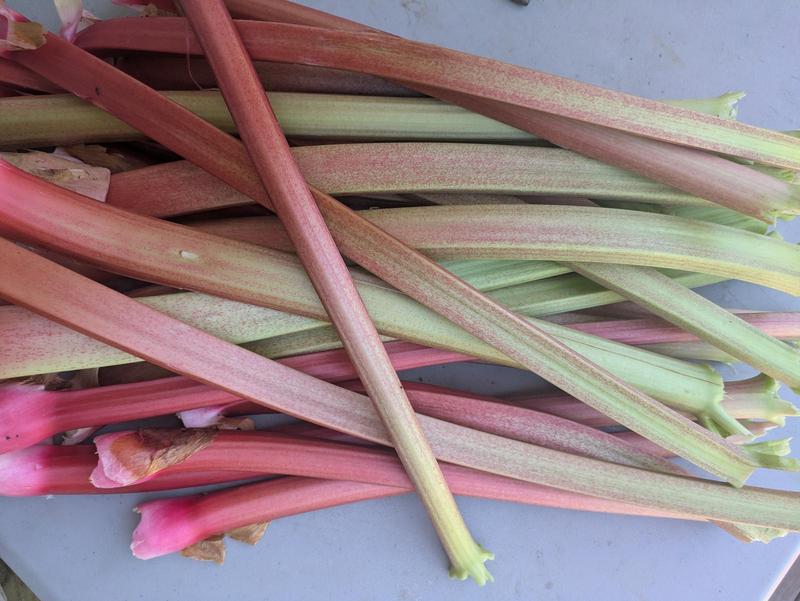
Plus, we have perennials that give us food: asparagus, blueberries—we added more this year (bluecrop, Northland, liberty, Chandler, patriot, pink lemonade), red table grapes, plums, crabapples, Oregon grape, rhubarb
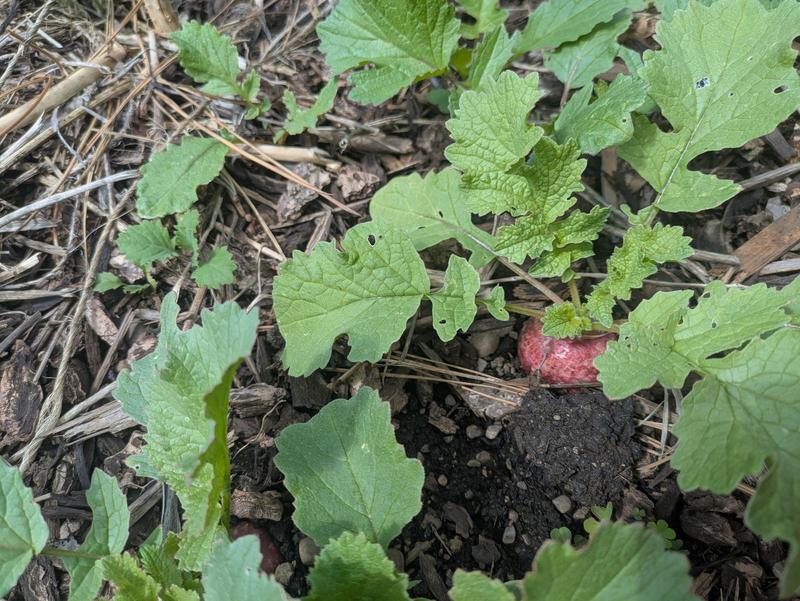
I've already harvested rhubarb! We made rhubarb barbeque sauce and candied rhubarb, since I've still got jam from last year's crop in my pantry. I've also harvested magnolia leaves and made pickled flowers!

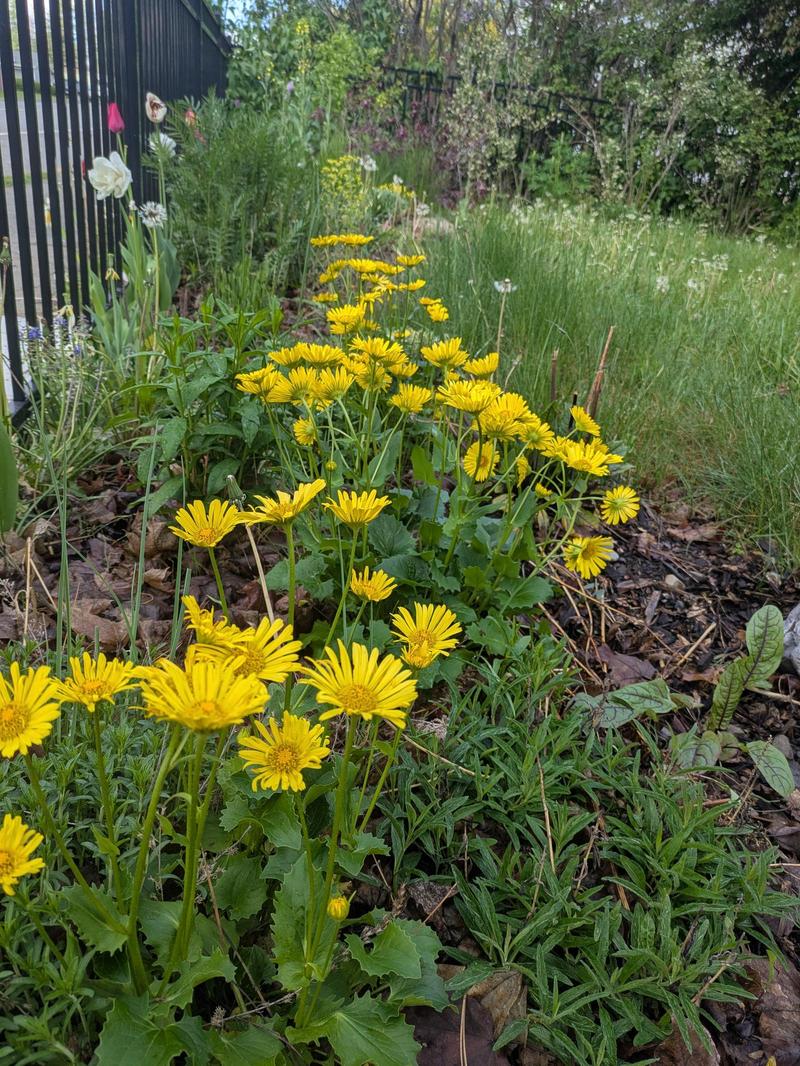
Front flower garden
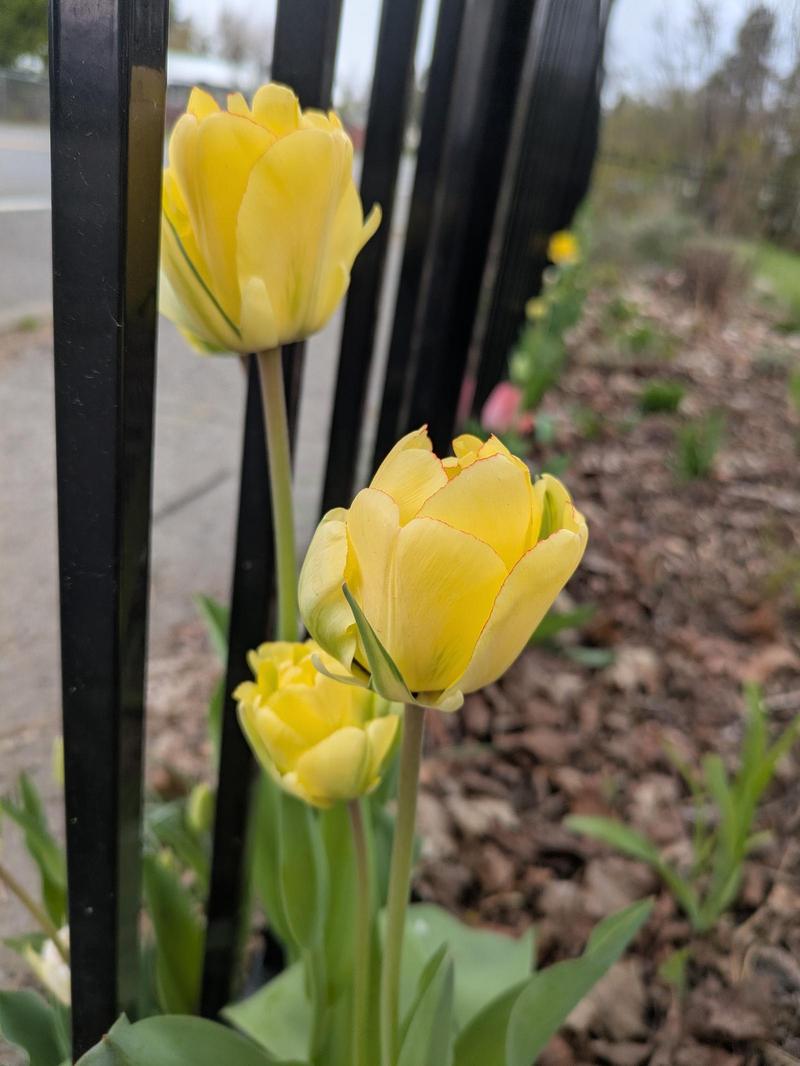
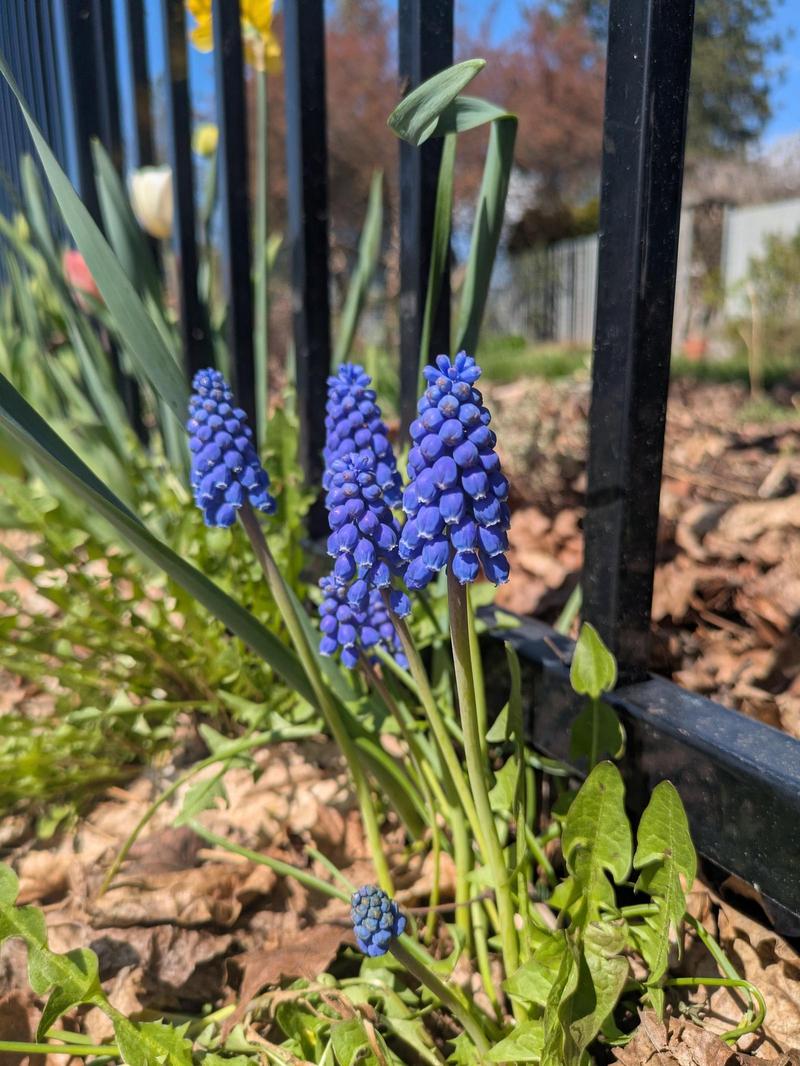
The flower garden is coming along nicely. Plants I've put in over the past two years are growing into their spaces. The tulips and other bulbs are just lovely, and a couple neighbors now refer to our house as "the tulip house"!
I'm planning on moving some of the perennials to the front garden area, as the soil has improved out there, I think I can actually grow some stuff. Since I have really been enjoying dock as a salad green and cooking green, I dug up and moved two from the raised backyard beds to the front. Since the variety I have is bloody dock, it has lovely red veins that make it decorative as well as tasty. I also started a few more from seed, which I plan on putting out front, too, when they're a little bigger.
I also have a couple echinacea plants and I might move some of those out front.
(Read: Learning to Identify Local Wildflowers)
Spring garden prep
On the warm weekends in March, I tried very hard not to do too much yard cleanup, because I knew it wasn't quite time yet and it might snow again. Pollinators might still be hibernating in my leaf litter!
But by early April, it was time. I had a cubic yard of compost to distribute around my yard. I spent a day removing old plant matter from the garden beds, raking mulch to the side, adding a layer of compost, and raking the mulch back. I dumped some compost by all the flowers, fruit trees, and shrubs, too. And I had great help this year! As my kids get bigger, they get more capable and helpful! All morning, my 8-year-old didn't even let me help fill the wagon with compost or drag it through the yard. It was amazing. I could focus on the cleanup and compost spreading. It was great having help!
Sharing the bounty
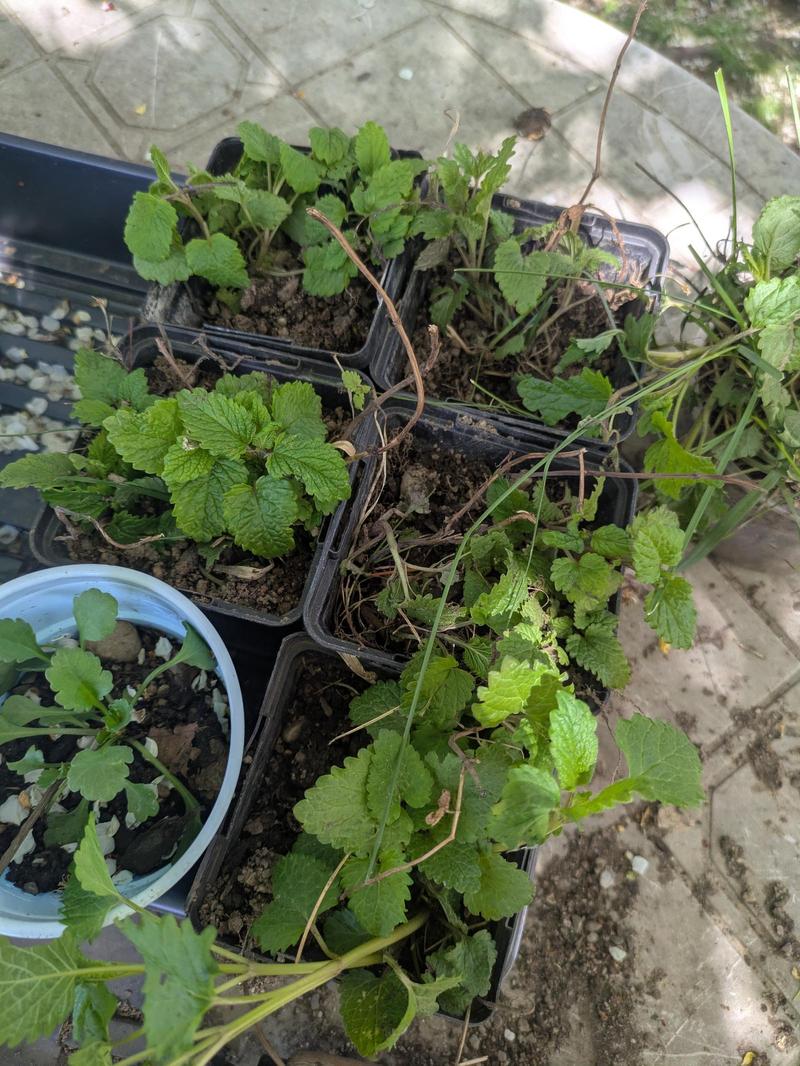
The lemon mint that grows under the largest backyard crabapple tree is prolific and spreading, as mints are wont to do. It was there when we got the house. So, I am stuck digging lemon mint out of the lawn in a probably futile attempt to keep it under control. (All my mint family plants are in containers, because I know what they're capable of.)
I put a bunch of little mint plants in containers and sold them, $2 a piece. I advertised on Facebook marketplace and sold way more than anticipated, over four dozen!
That success inspired me to share some other plentiful plants, such as the calendula and spoon tomatoes that keep self-seeding all over the yard. My 8-year-old was in on the fun. He had—thinking of pesto—started a ton of basil seeds. He transplanted some into plastic cups and I listed them for sale. He's delighted to have sold a dozen to our friends. He also has sunflower starts for sale, started from seeds he collected from last year's sunflowers.
I also have a bunch of Bishop's Weed growing as ground cover in a section of my front yard. It spreads like crazy. It had spread into a 4x4' raised garden bed that was in the front, but, as it happens, that garden bed is falling apart and I wanted to remove it. (It wasn't new when my grandma gave it to us, and we got a good six years out of it.) I dug all the bishop's weed out, put it in 1-gal and 2-gal pots, and so far have sold over 40 of them. From one lady I sold some to, I guess it's hard to find, but in the right hands makes a wonderful ground cover. It does have pretty leaves.
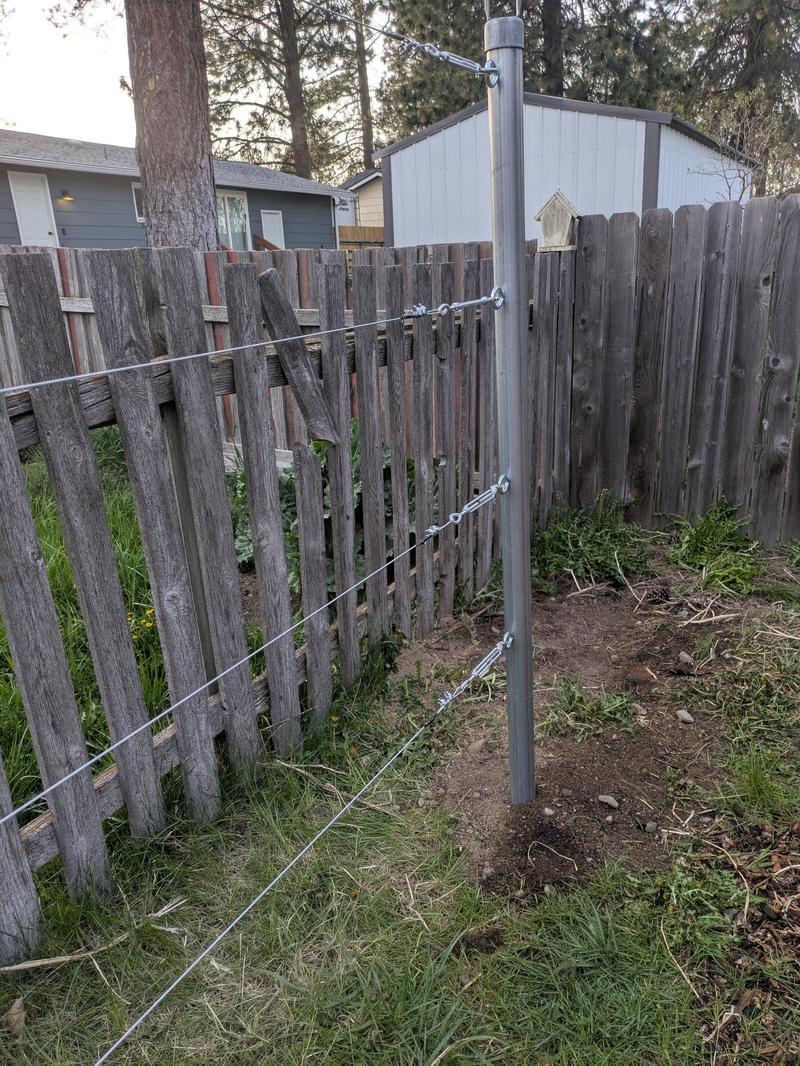
Grapes
One more new thing: Grapes!
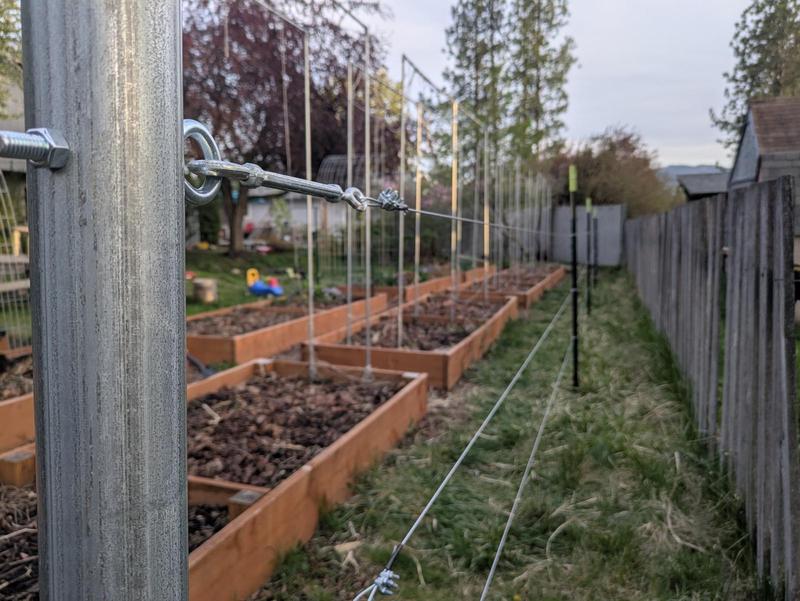
Our plan, ever since expanding the garden two years ago, had always been to build a trellis beside the garden, between the second row of raised beds and the back fence. This year, we finally did it!
First, we relocated two fence posts to be the trellis anchors. Both posts had huge cement footings. Digging them up and hauling them across the yard was a challenge! But the posts needed to move anyway, and repurposing them for the trellis was exactly the kind of thing we would do.
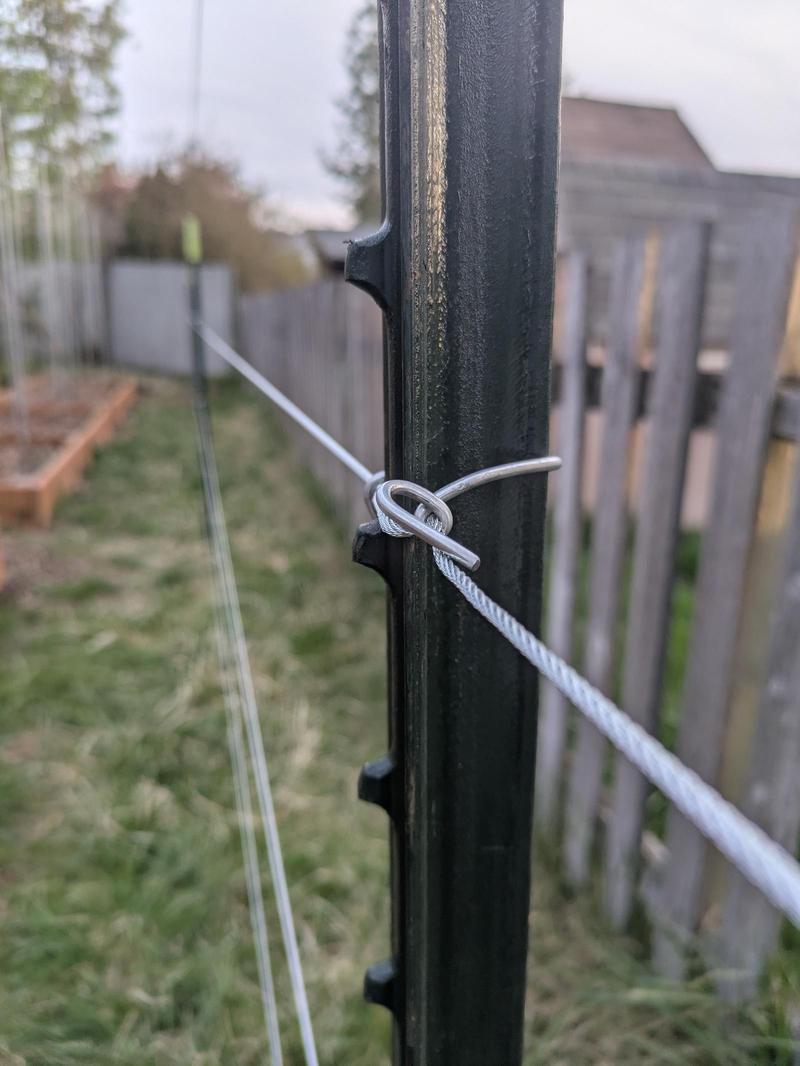
Second, we put three t-posts in between the fence posts. We put eye bolts through the fence posts at either end, attached a stranded wire to each, clamping the ends and stretching the wire from post to post to post to post. A turnbuckle at one end of each wire let us tighten the wire after attaching it.
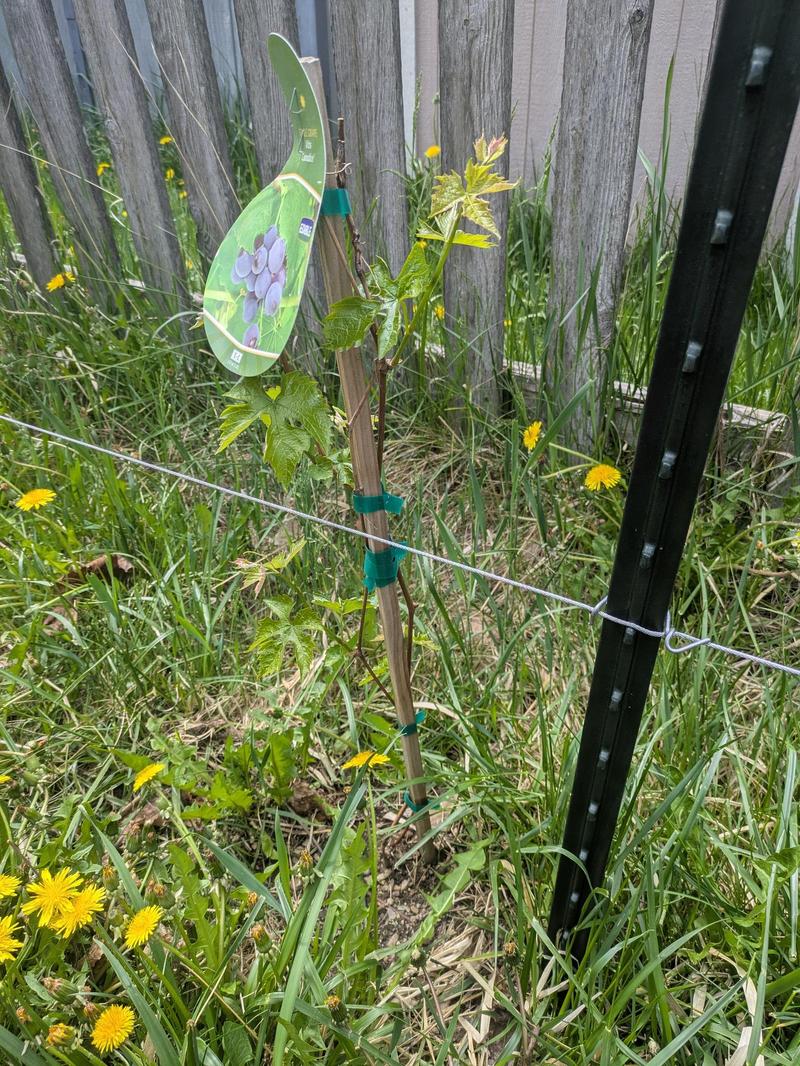
Finally, we visited a local nursery and brought home 9 new grape vines! They're all red table grapes. We have two other locations in the yard that might be good spots for grapes, so we may add another variety or two in the future…

Trellising
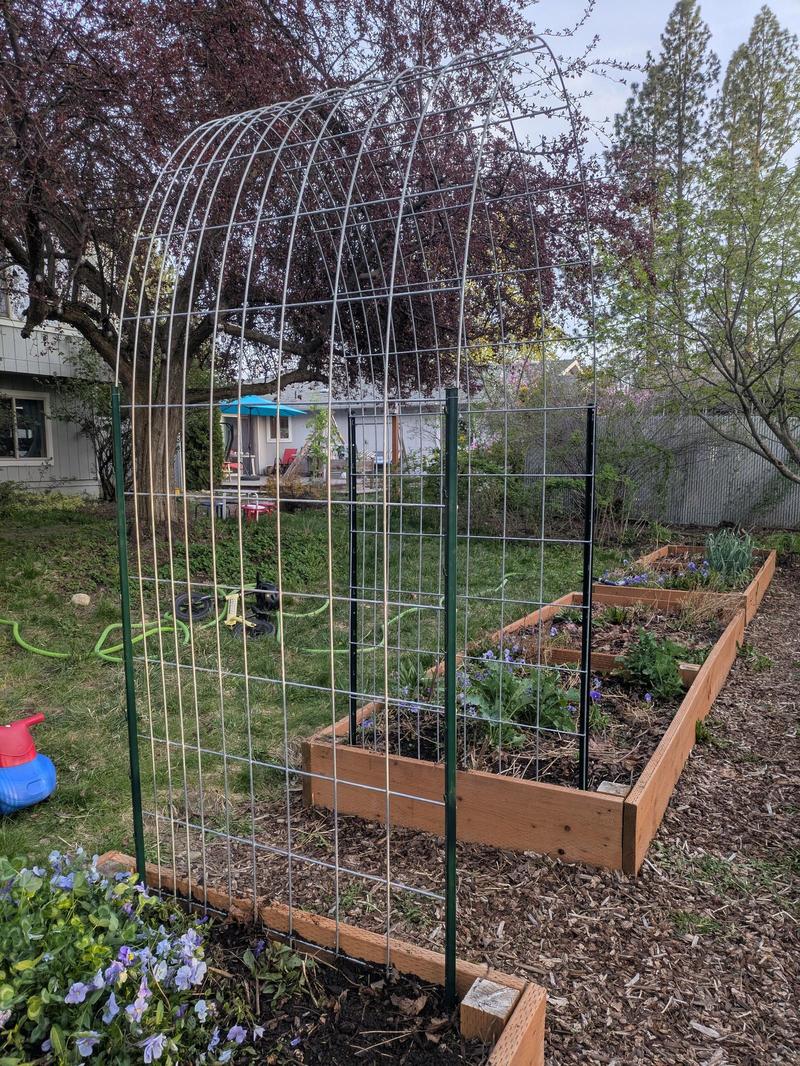
While we were trellising, we also bought two hog panels and some u-posts, and set up two arches in the garden for vining plants to climb over. I've planted peas, beans, and nasturtiums nearby to start.
It's still early in the gardening season here. I'll be moving the rest of my starts into the ground over the next week or two!


Pickled Magnolia Blossoms